

Roseville Accessible Bathroom Remodel
Roseville, CA
Timeline
7 Weeks
Location
Roseville, CA
Budget
$38,992
Completed
July 2026
Overview
Some remodels are about style. This one started with something more important. The homeowner was bringing her mother home to live with her, and her mother had limited mobility. The guest bathroom couldn’t work for her or for anyone helping her: a tub-shower combination, a double vanity, and a three-sided partition wall cut the floor into tight pieces, with no clear path for a walker or wheelchair and nowhere for a caregiver to stand.
She came to Parrish Construction with a complete design of her own and a clear brief: the room had to be fully accessible, and it could not feel like a hospital room. Rebuilding a bathroom for a wheelchair is a common request. Doing it on a concrete slab, with a true curbless shower, while keeping every finish warm and intentional, is not.
The project falls within our Luxury Bathroom Remodel tier: a full gut, structural concrete work, a reconfigured layout and custom finishes throughout. Everything came down to the slab. The goal was a bathroom where a wheelchair could roll from the door straight into the shower without a curb, a lip, or a ramp.
Key Features
- True zero-threshold shower recessed into the existing concrete slab: a 41⅝″ × 59″ curbless pan with a center drain
- Soft-close pocket door replacing the swing door, with light switches moved to the latch side
- Brizo valve and diverter placed near the shower entry, plus a Brizo hand shower on a slide bar and a ceiling-mount rain head
- Grab bars at the toilet and in the shower, every one anchored into solid blocking
- Schluter-FINEC edge protection on the pony walls and shower opening for a mitered look that won't chip
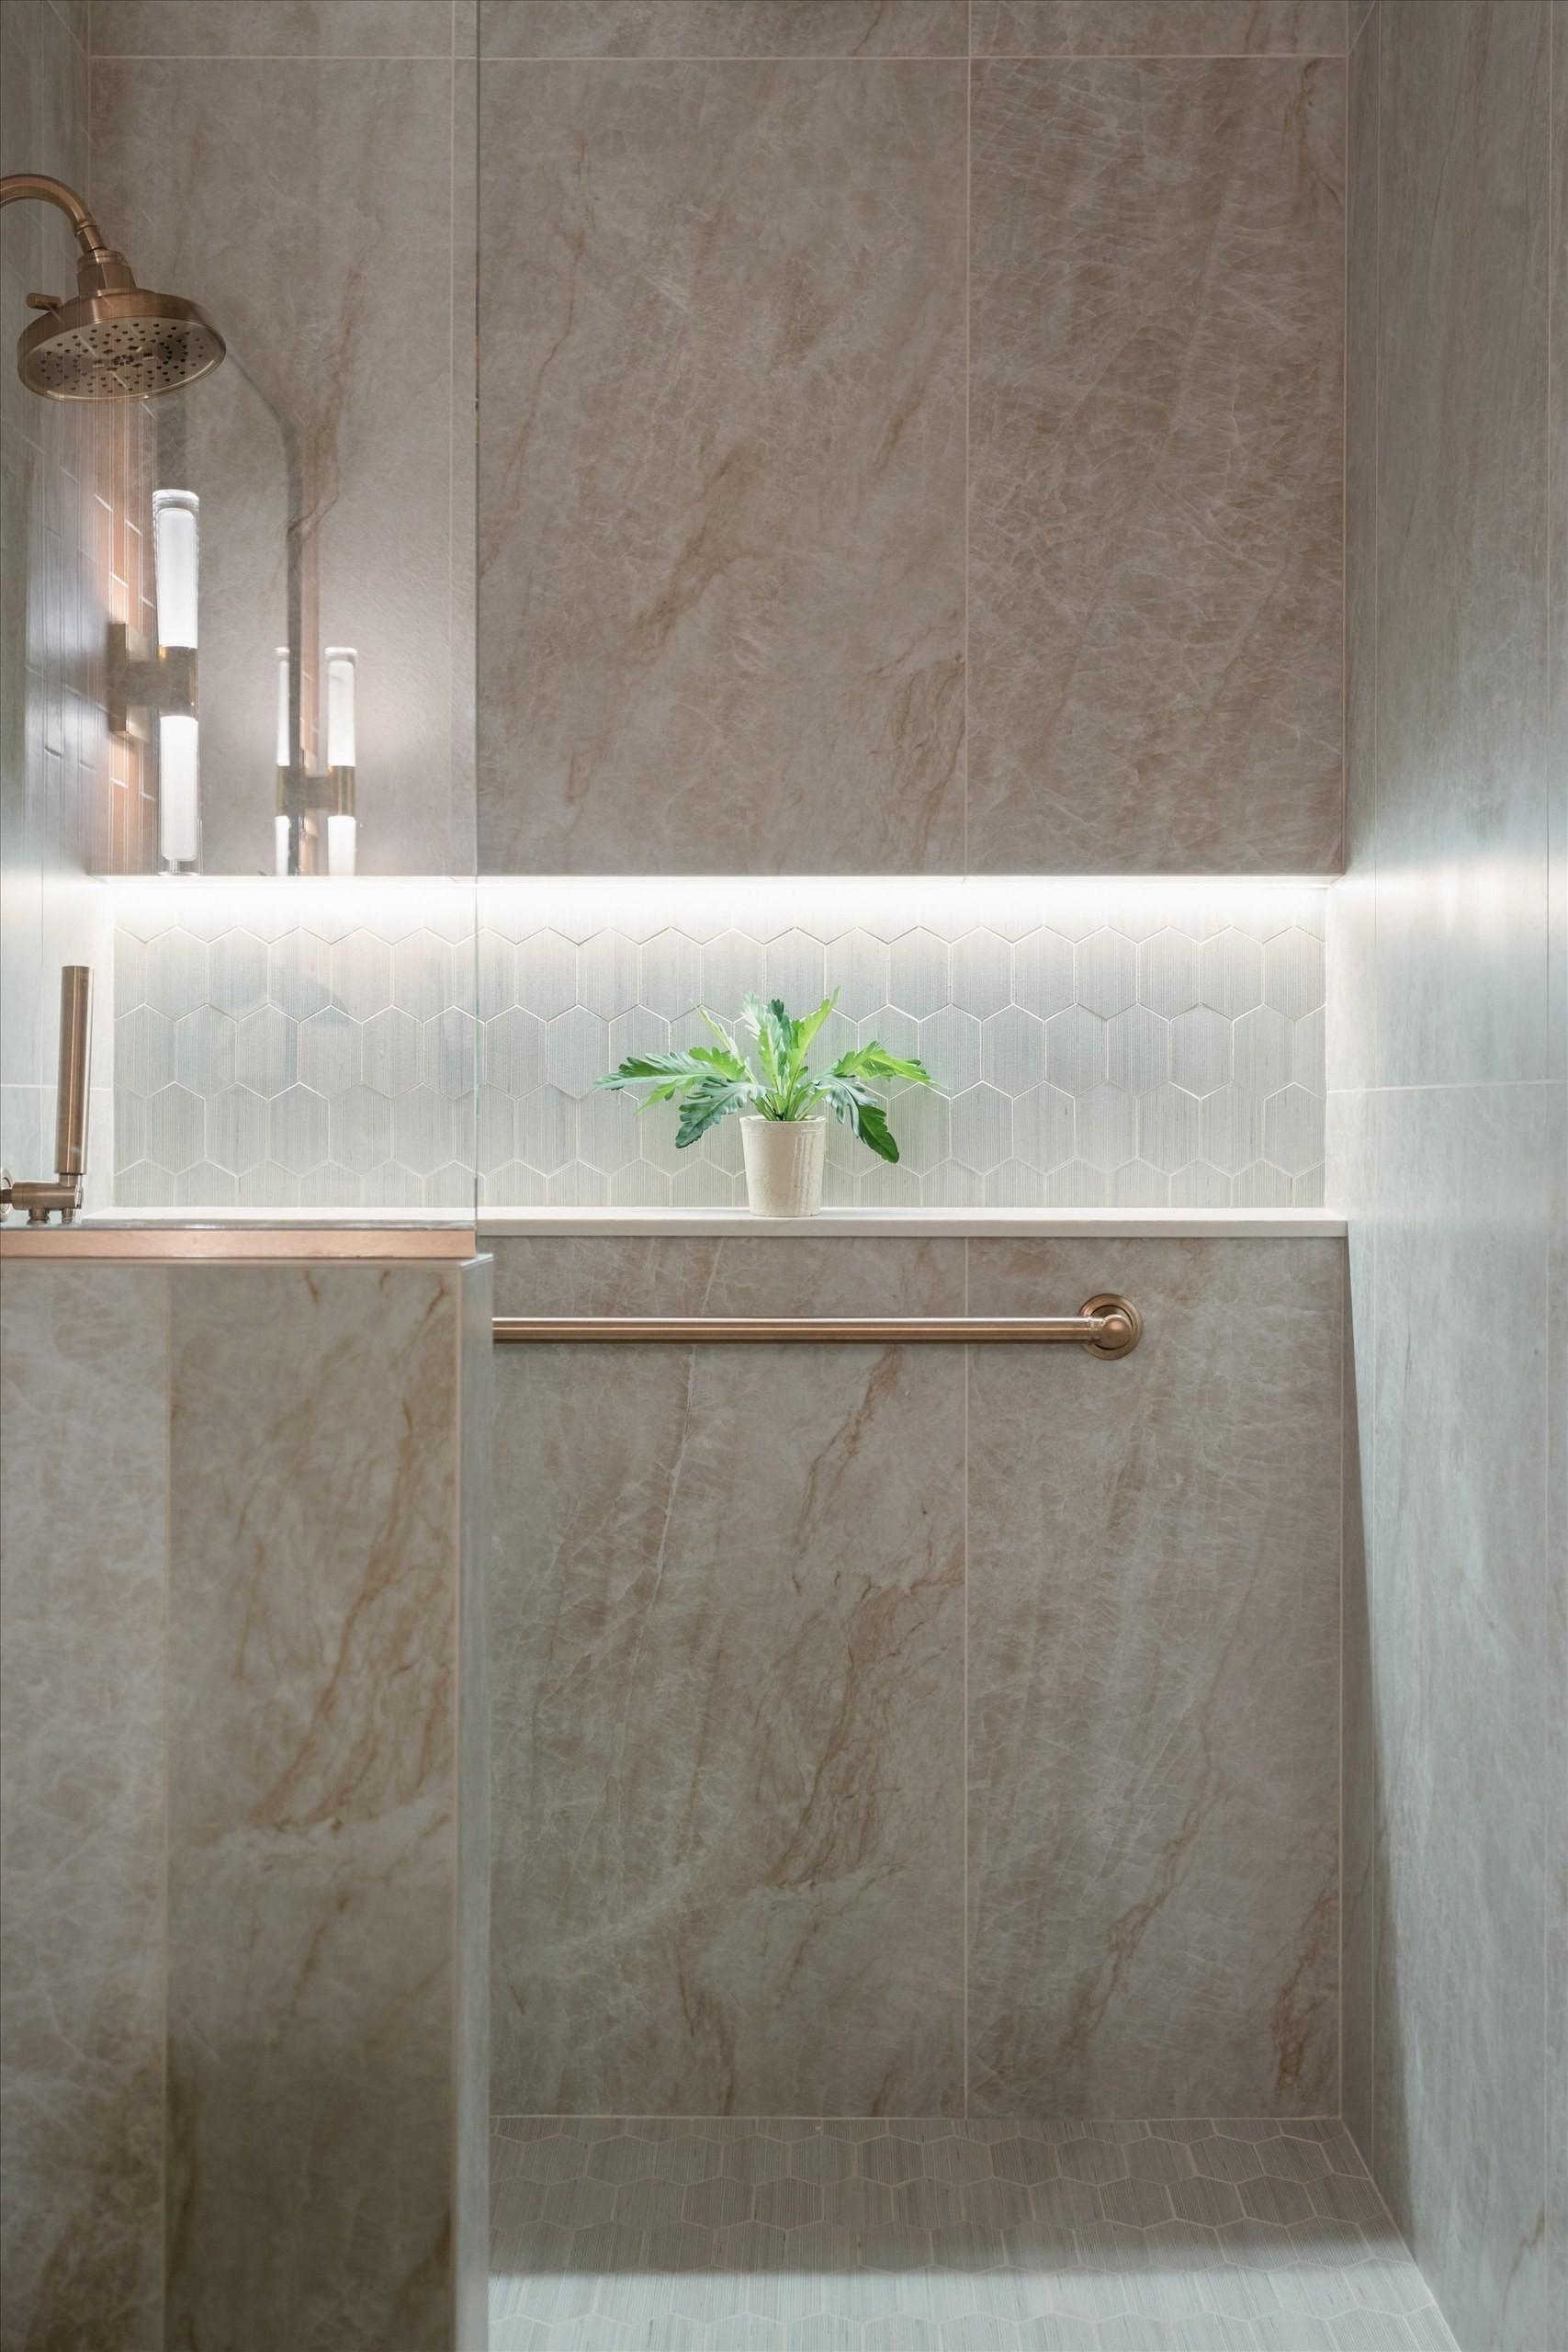
- Full-width 59″ lit shower niche with an LED strip housed in a Schluter Deco-SG profile
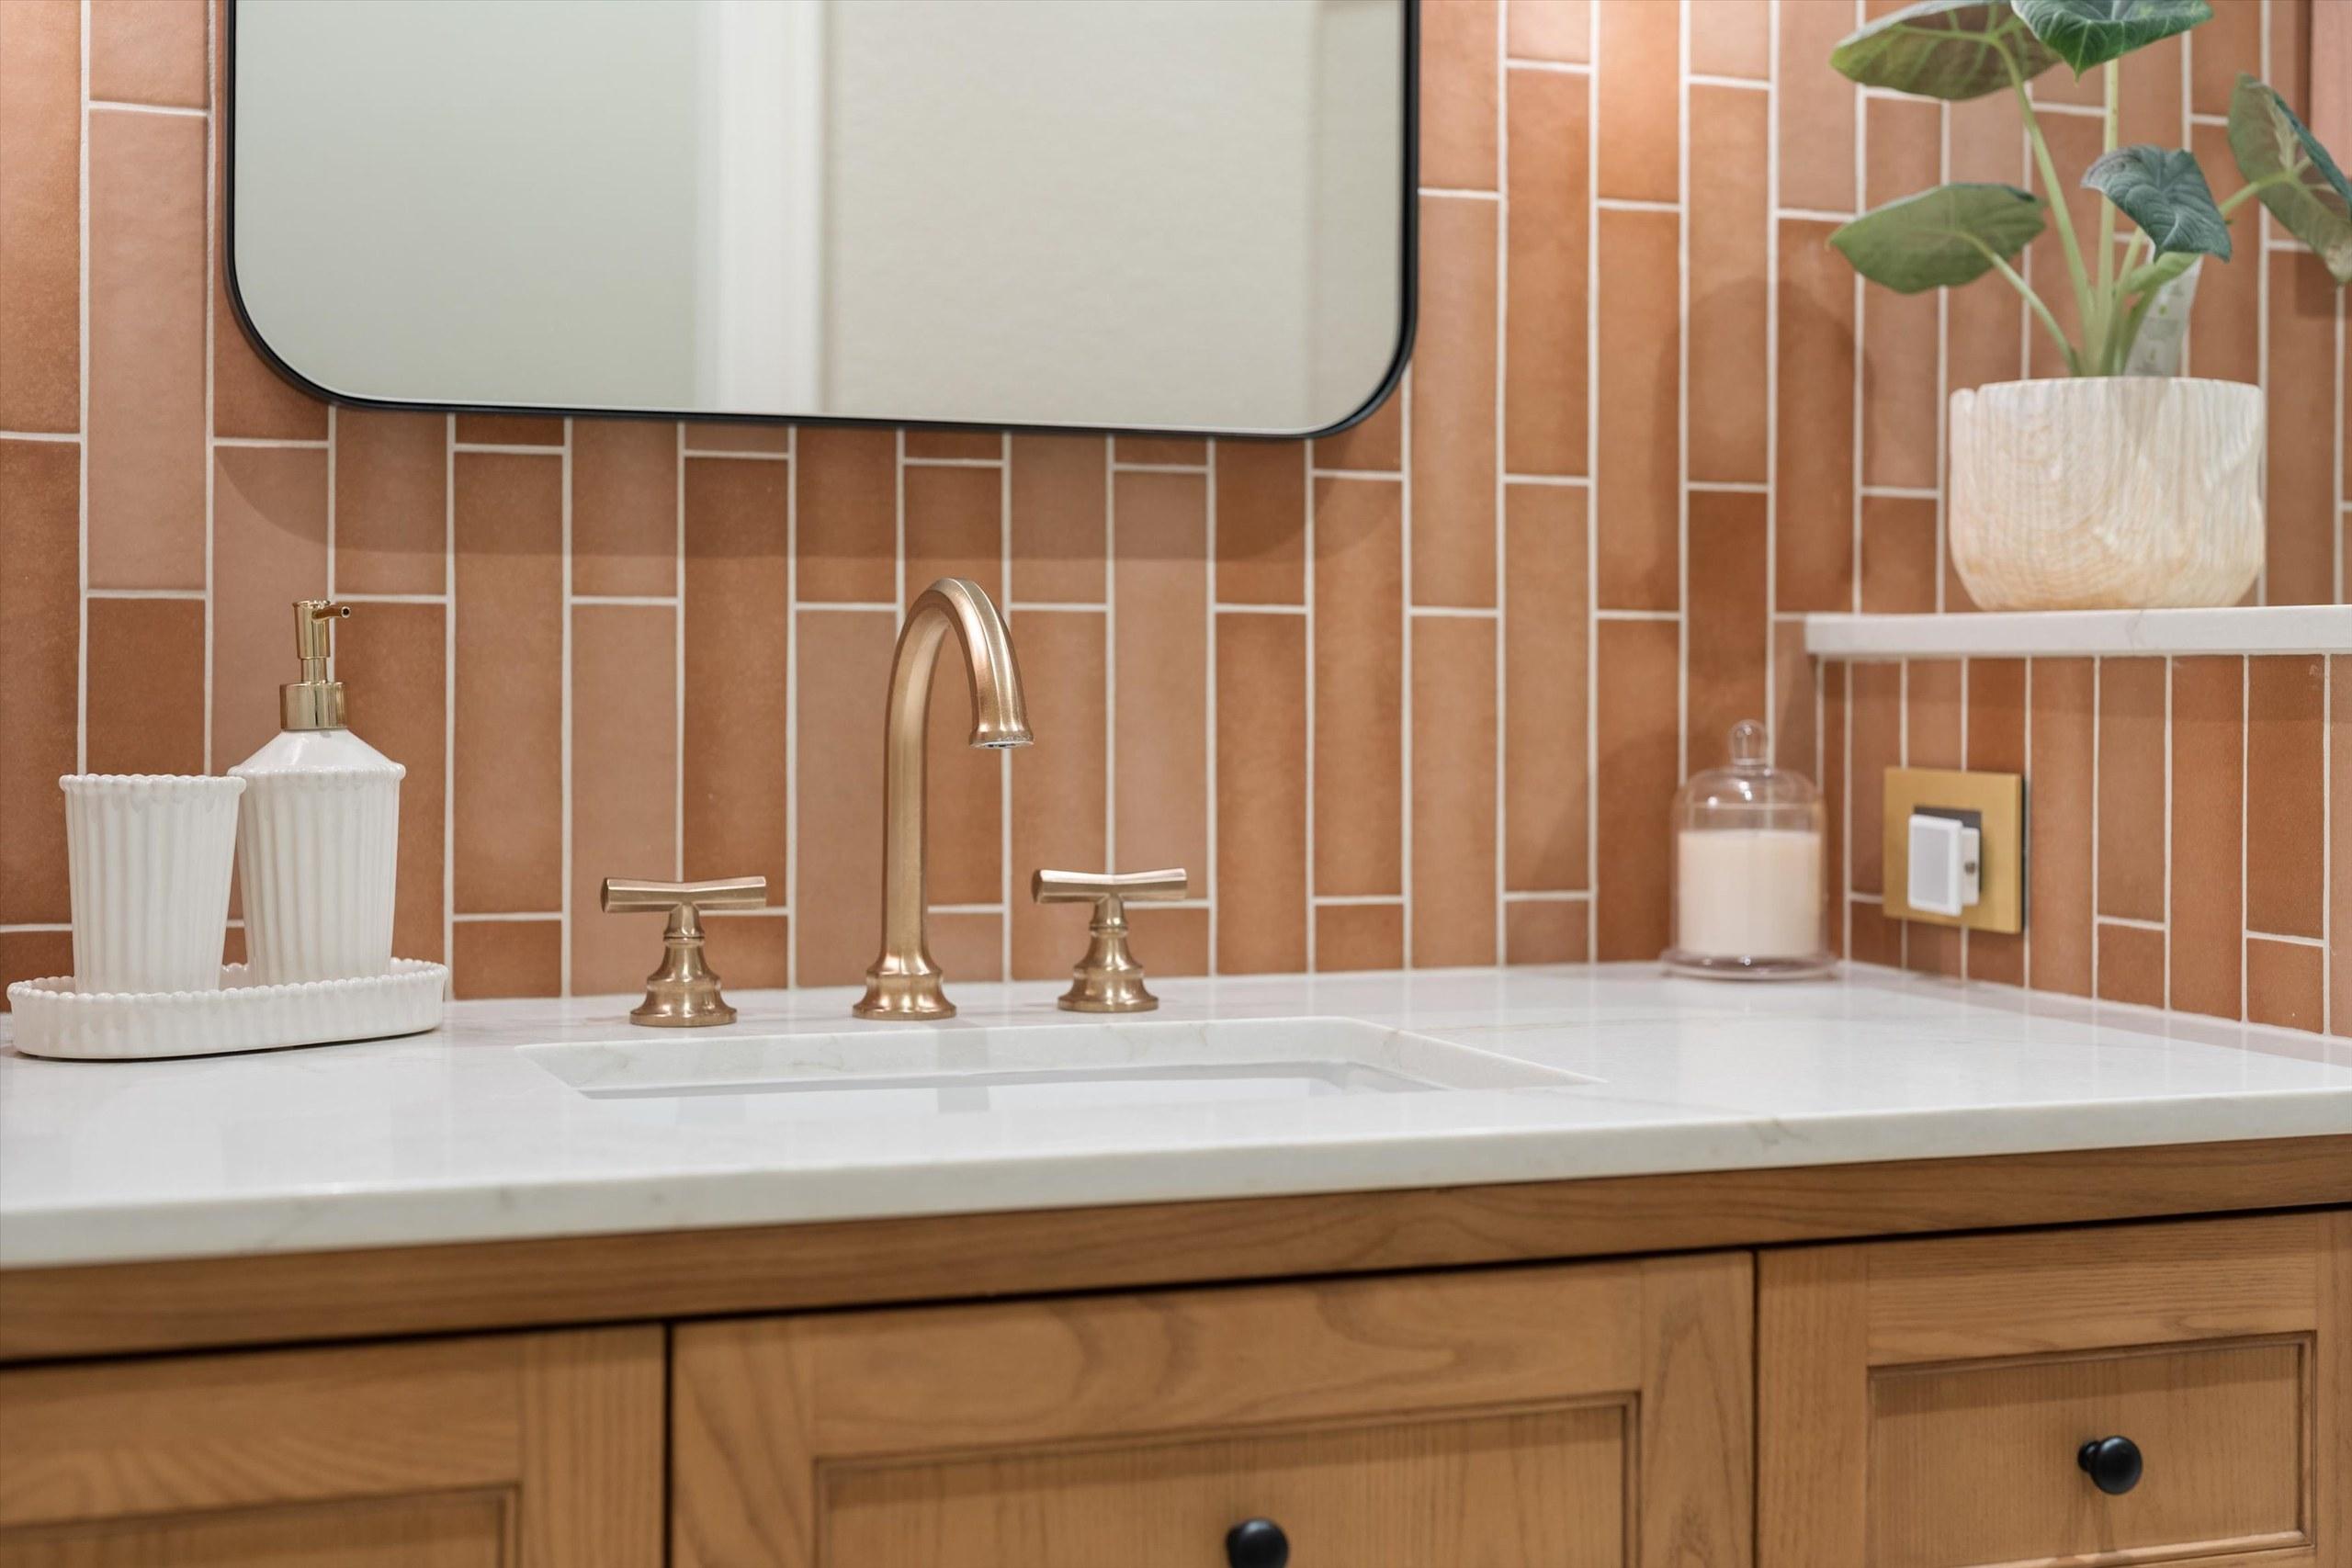
- 24″ × 48″ large-format porcelain on the shower walls, soffit and ceiling, marble hex mosaic shower floor, terracotta vertical-stack vanity wall and patterned hex porcelain floor
- 48″ James Martin single-sink vanity with an in-drawer outlet, and natural stone remnant caps on the pony walls
The Palette
Every finish in this project, sized by how much of the room it covers.
The Transformation
Opening Up the Floor Plan
The original layout gave most of the room to a tub that couldn’t be used safely, and a three-sided partition wall split what was left. The team removed the tub, the double vanity and the partition entirely. In their place went a single 48″ vanity, a relocated toilet and a 41⅝″ × 59″ curbless shower, with two short, stone-capped pony walls defining the vanity, toilet and shower zones without closing any of them off.
The result is a clear, open path from the door to the shower, wide enough for a wheelchair, a walker, or two people side by side. The swing door, which opened into that path, became a soft-close pocket door, and the switches moved to the latch side so they’re within easy reach on the way in.
 Before
The original tub-shower, double vanity and three-sided partition wall
 After
An open path to the curbless shower, with low stone-capped pony walls defining each zone
Cutting the Slab for a Curbless Shower
A curbless shower only works if the shower pan sits below the bathroom floor, so water drains toward the shower instead of out into the room. In a house built on a concrete slab, that means cutting the foundation.
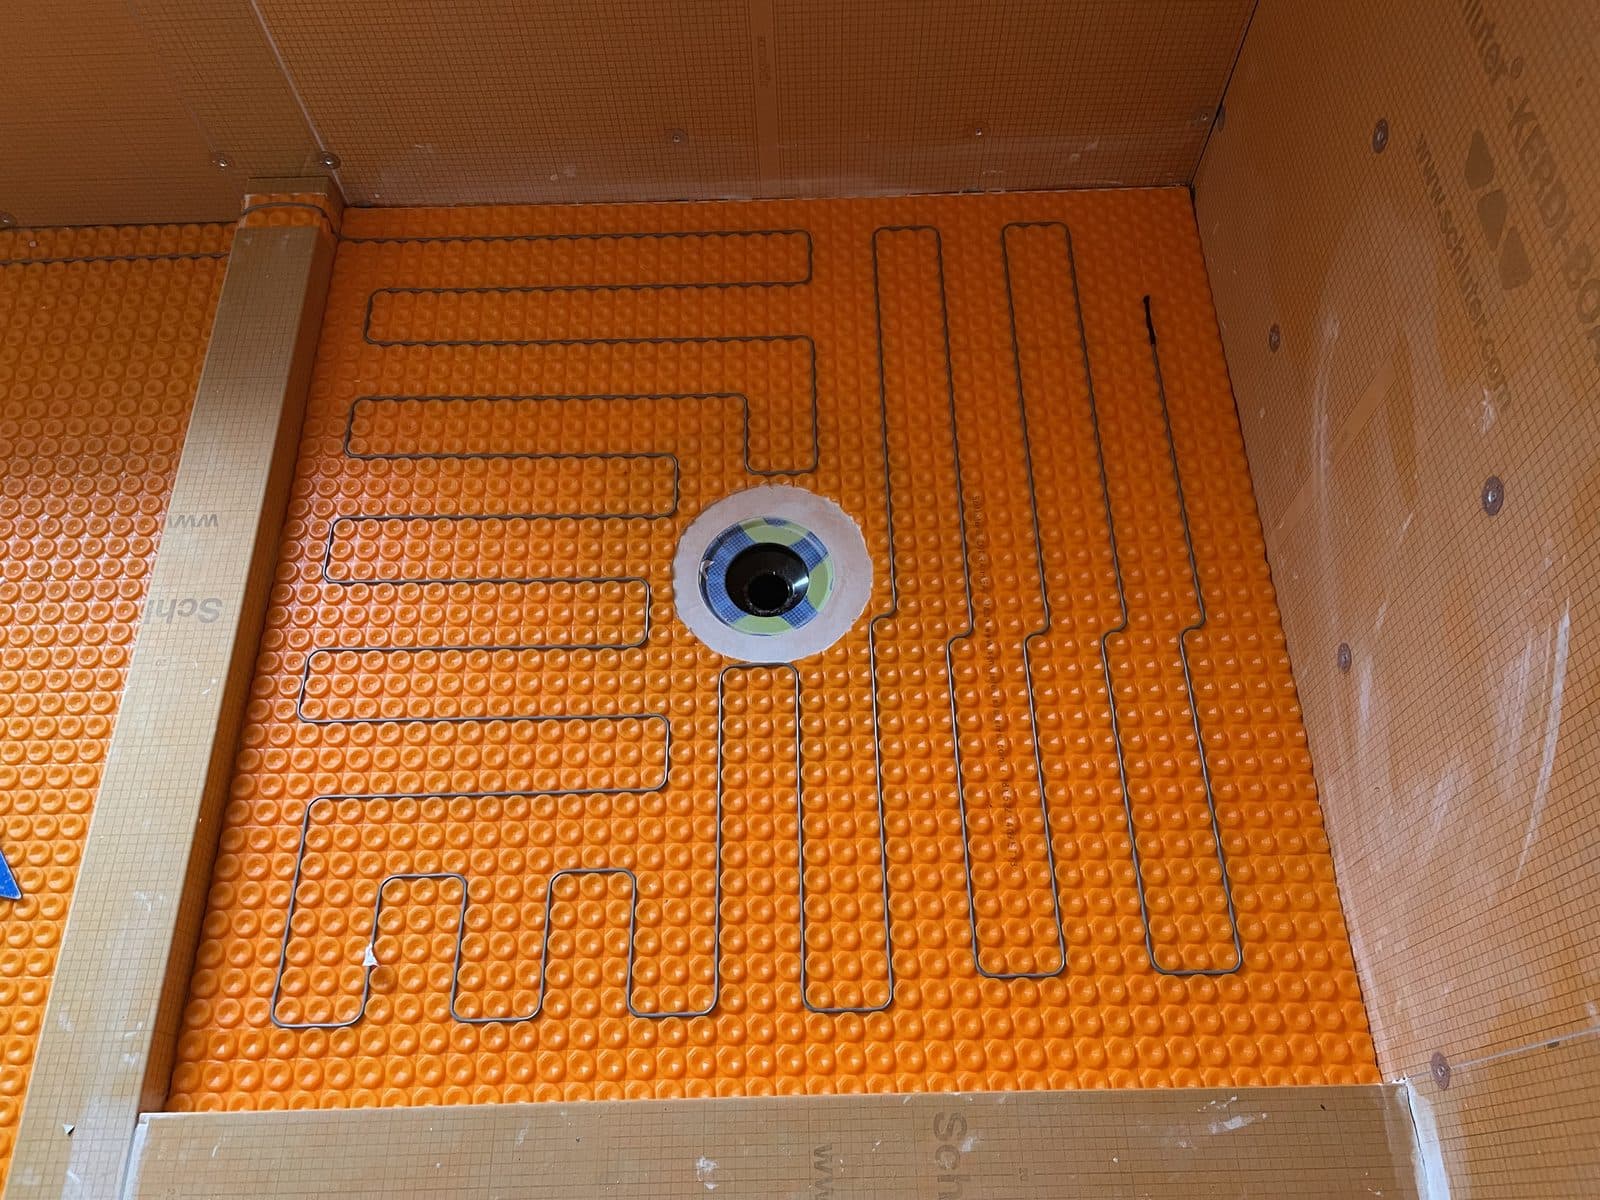
The team sawcut and removed about 15 square feet of slab, epoxy-doweled #4 rebar into all four sides of the remaining concrete, and poured the shower area back at a lower elevation to create the recess. In the same pour, the shower drain moved to the center of the new pan and the toilet flange shifted up to 12″. Schluter KERDI waterproofing ties directly into the recessed slab, so the patterned bathroom floor flows into the marble shower floor with no curb, lip, or ramp.
 Slab cut
Slab sawcut out, with rebar doweled into the surrounding concrete
 After
The finished floor flows straight into the shower with no curb
The Shower
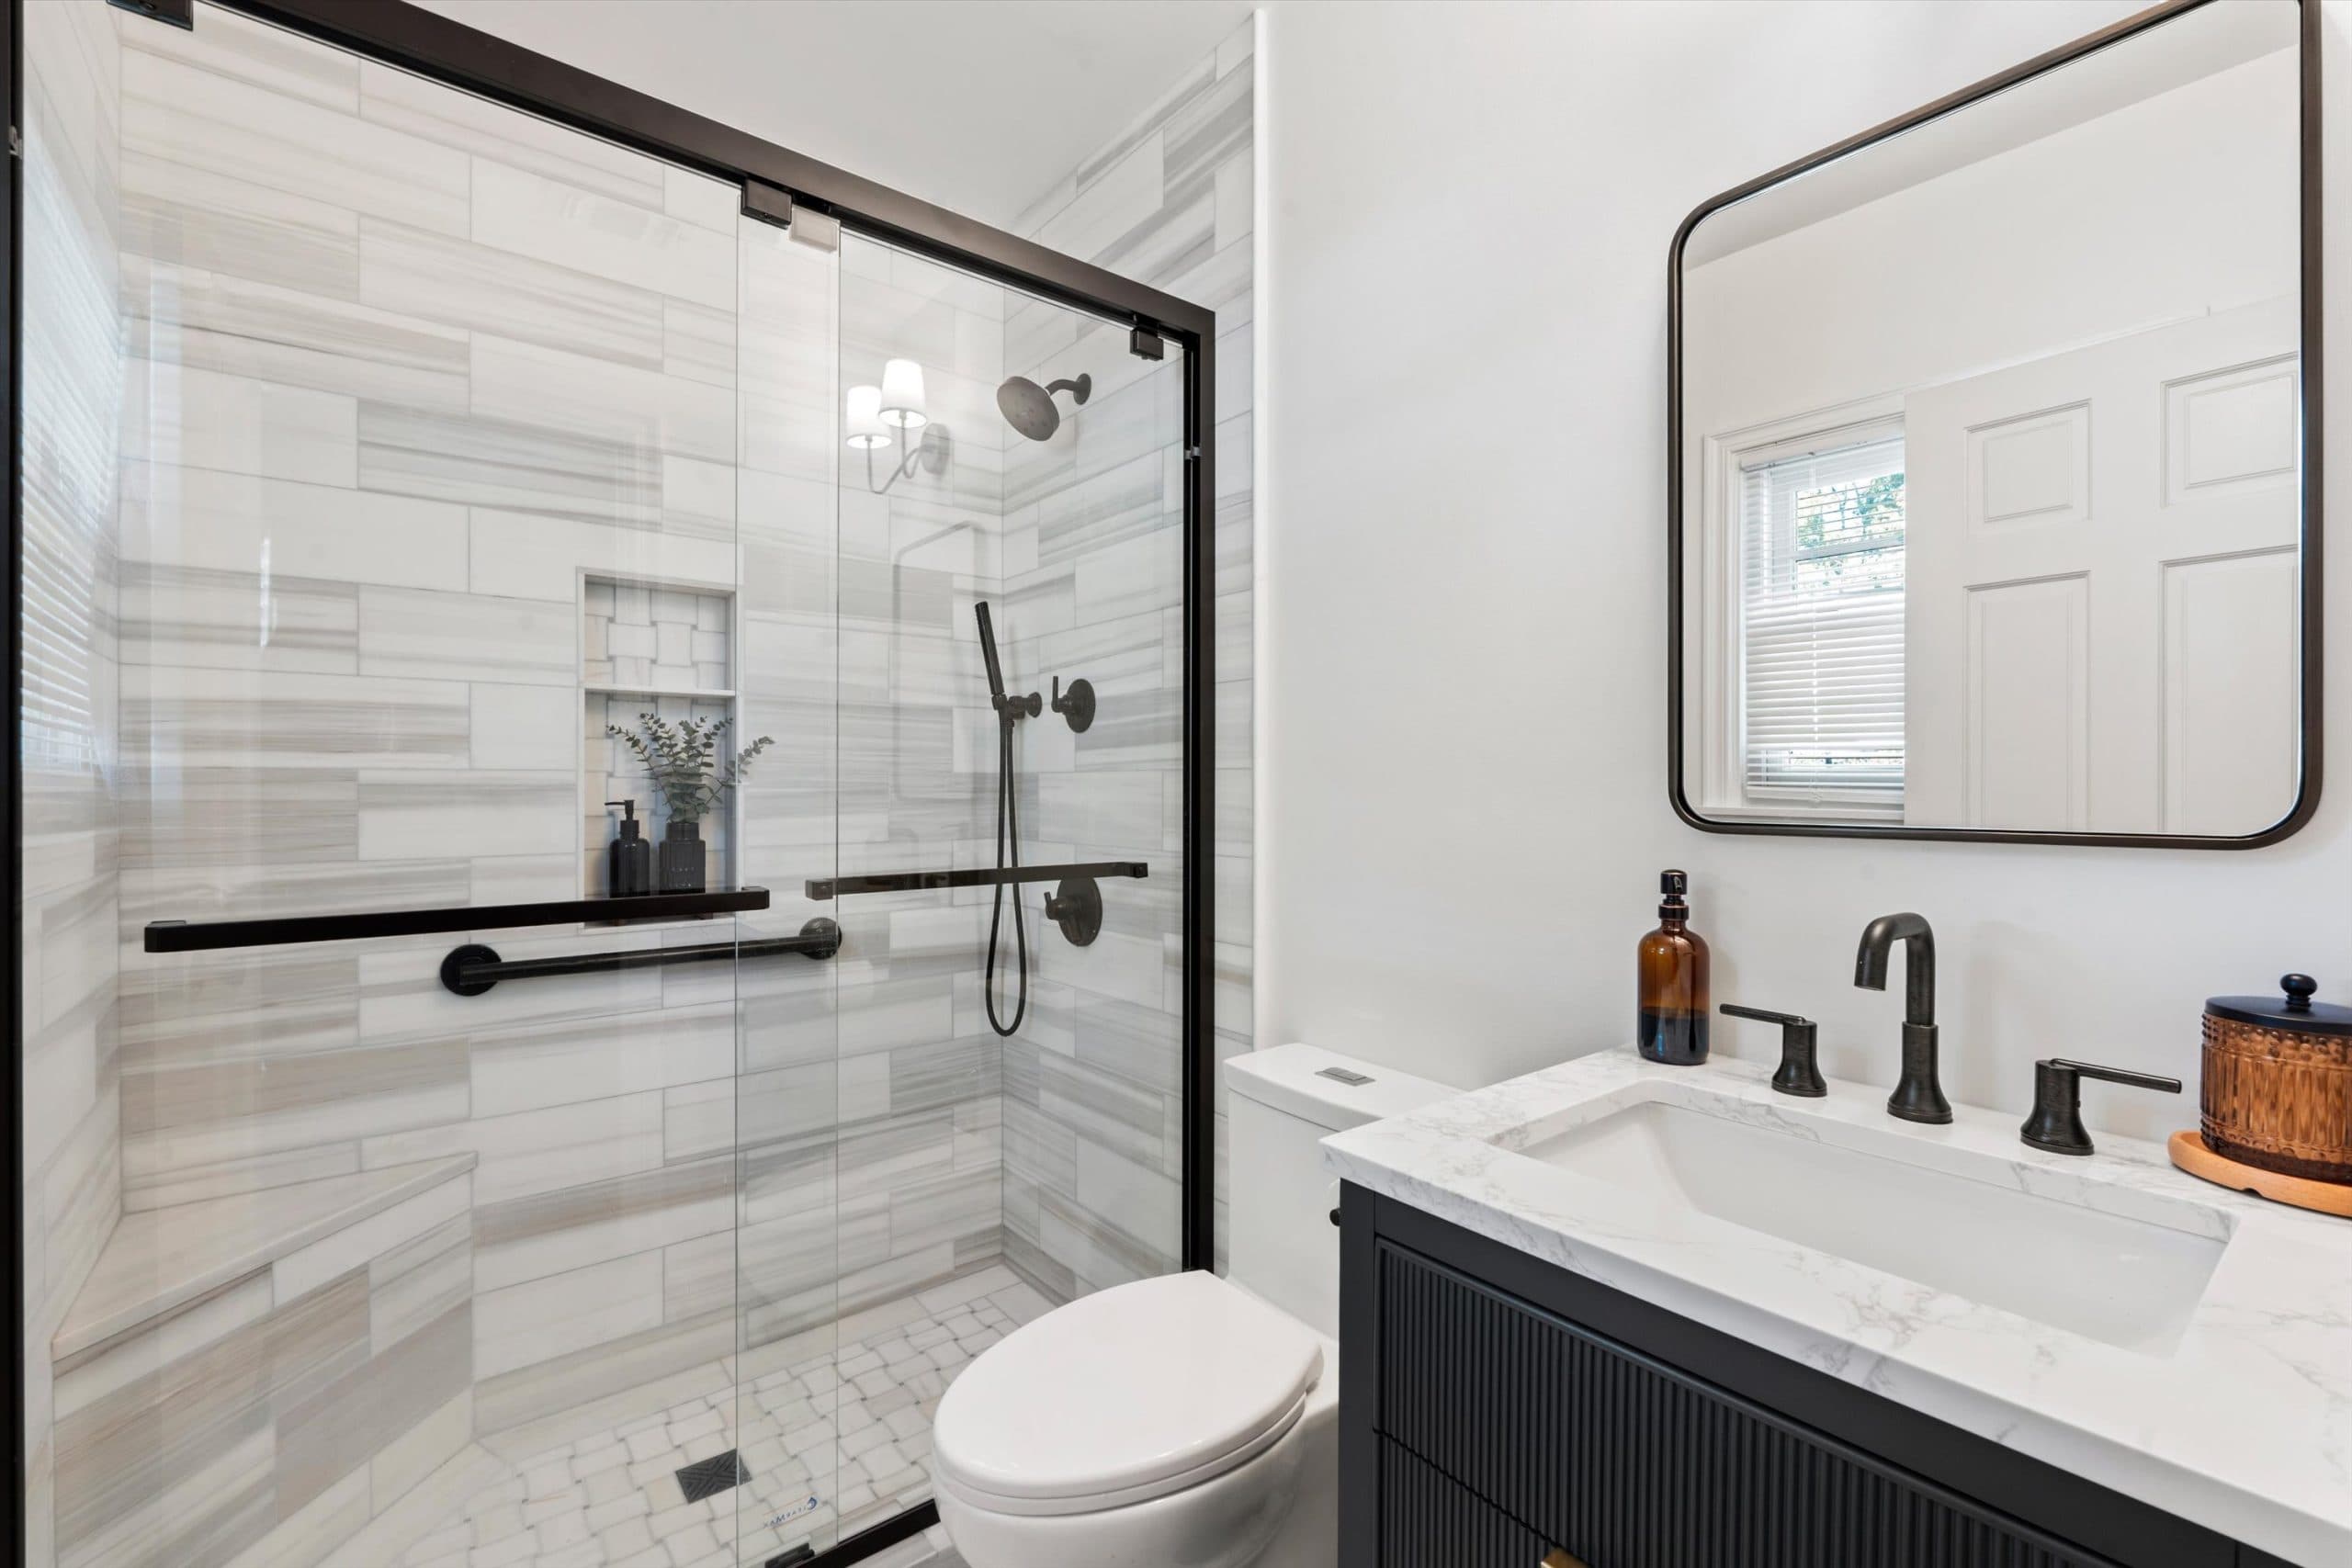
Every control was placed with a caregiver in mind. The Brizo valve sits near the shower entry, so the temperature can be set from outside the spray. A hand shower on a slide bar supports seated bathing, a ceiling-mount rain head handles everyday use, and grab bars are anchored into solid blocking.
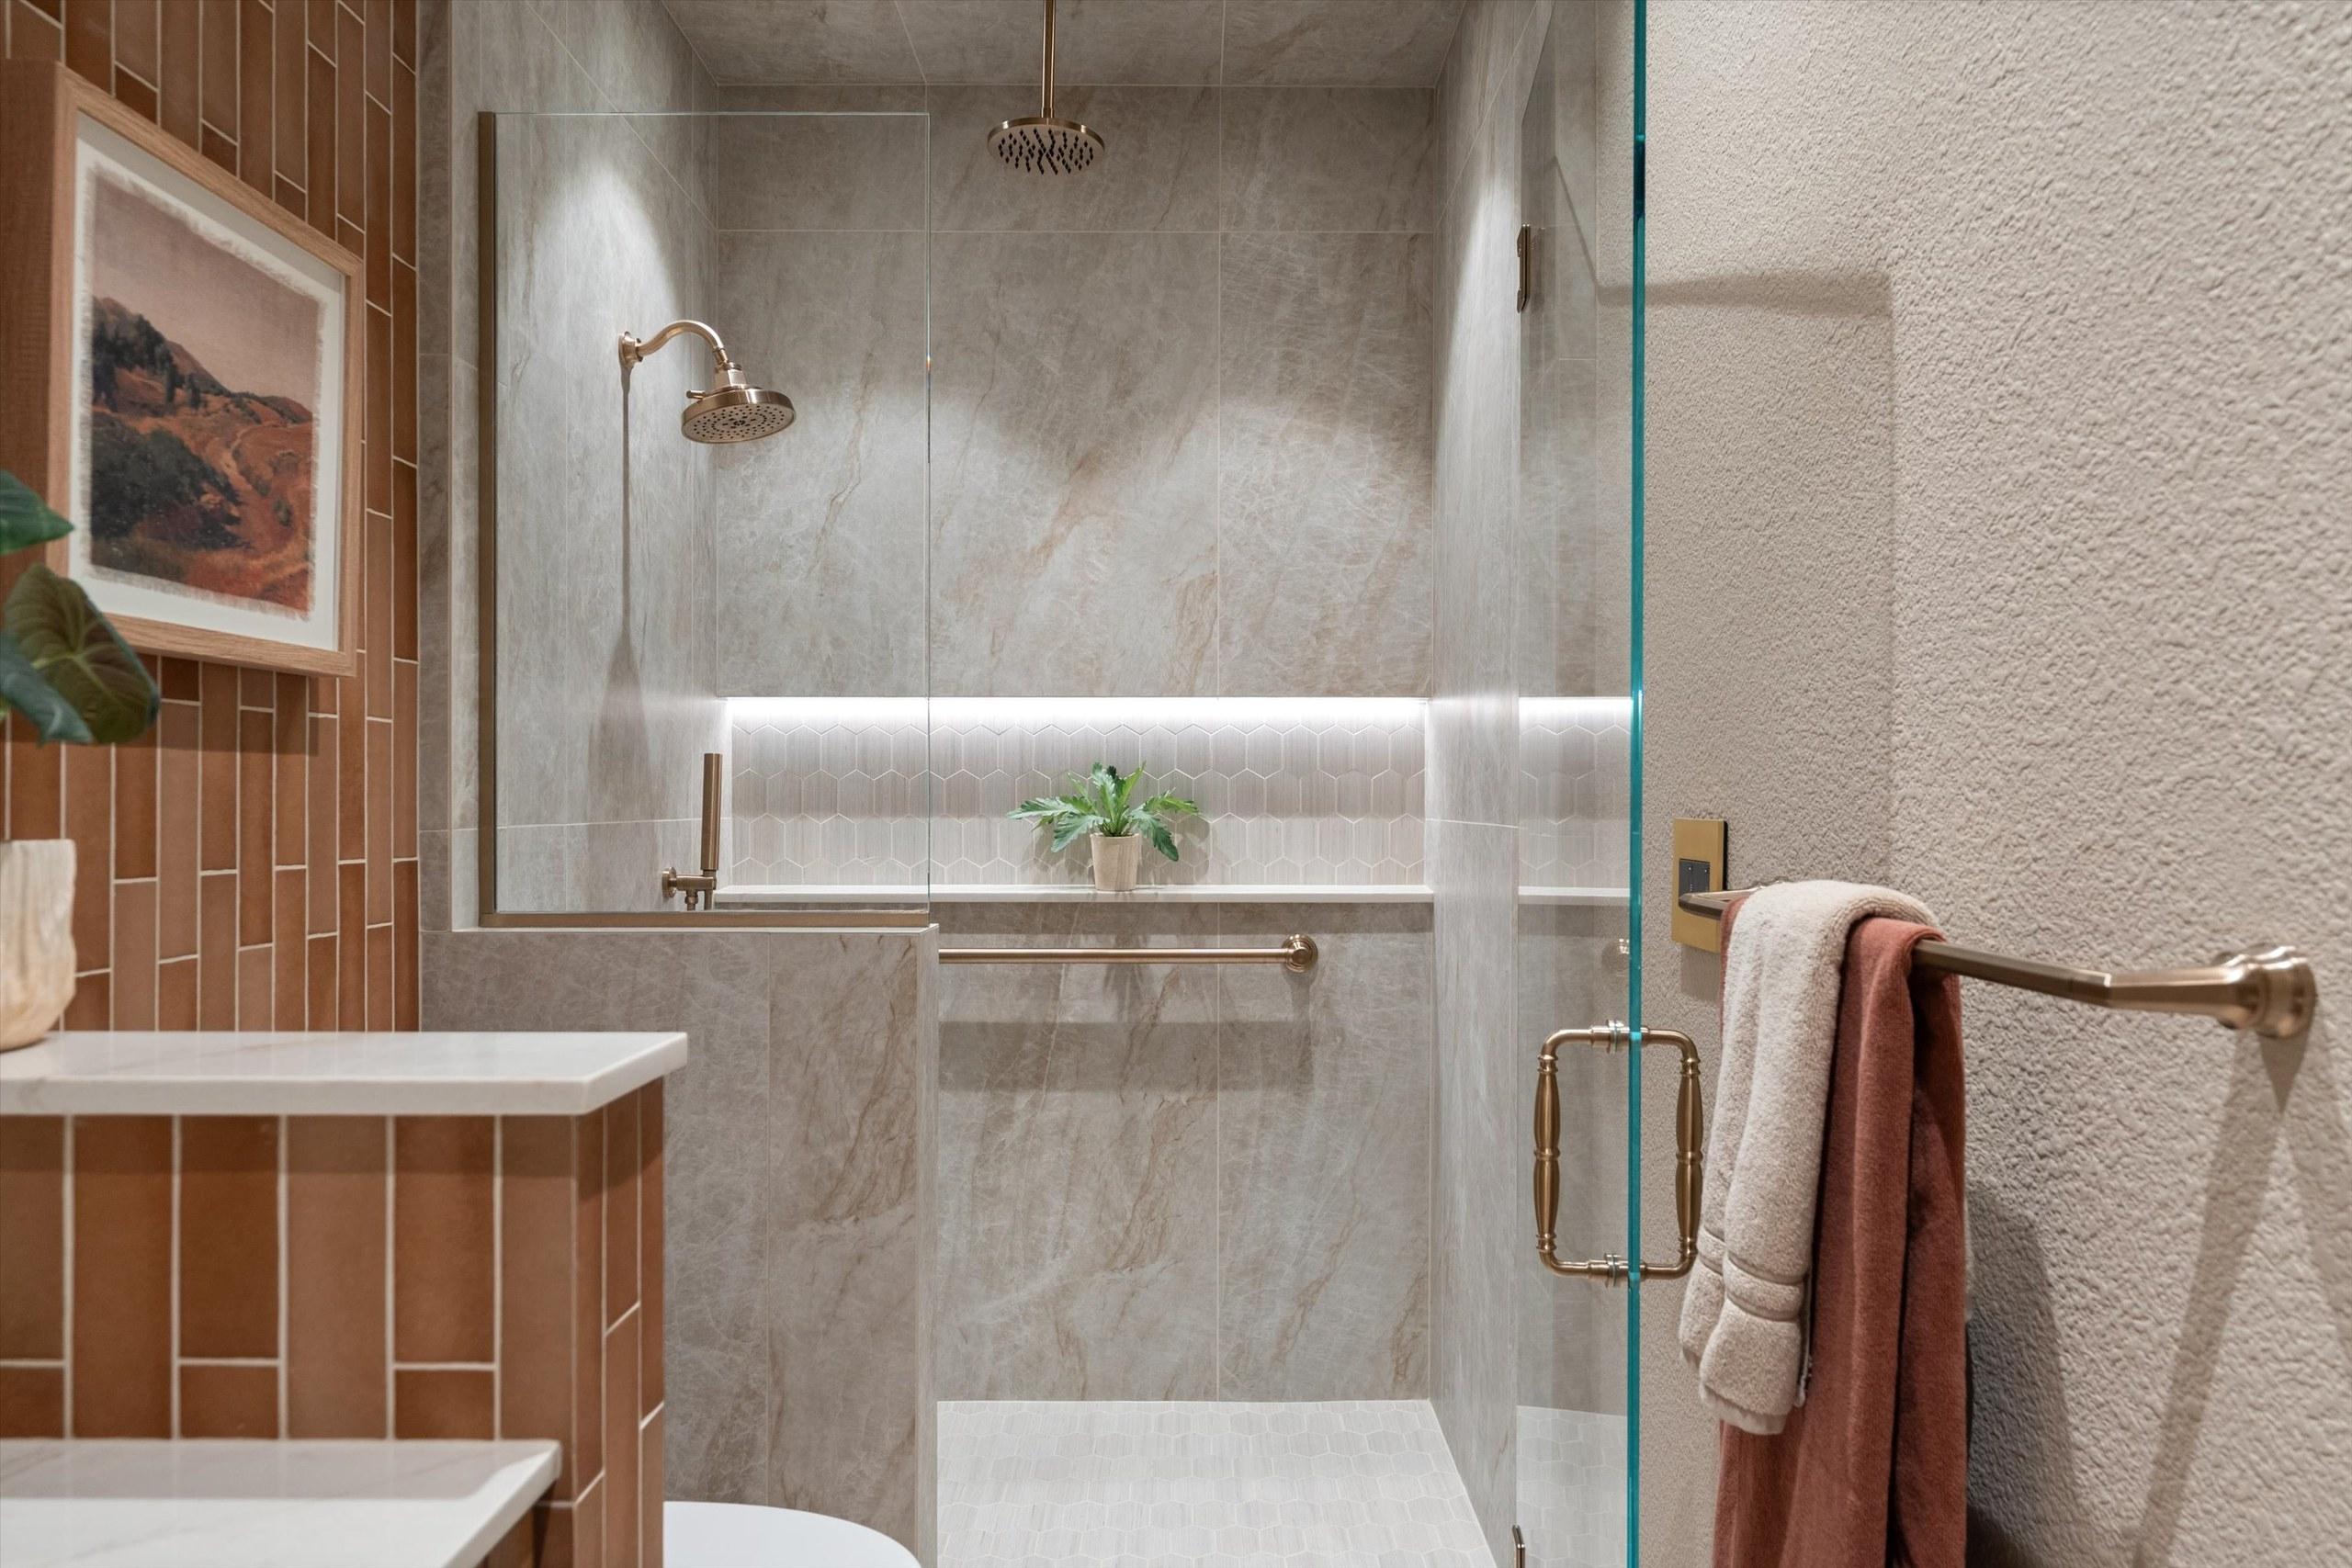
Large-format 24″ × 48″ porcelain wraps the shower walls, soffit and ceiling, set with a leveling system so the long panels stay flat. A 59″ full-width niche, backed with fluted hex mosaic and lit by an LED strip in a Schluter Deco-SG profile, works as storage, a focal point and a gentle night light. The marble hex mosaic floor was triple-sealed: back, face, and again after grout.
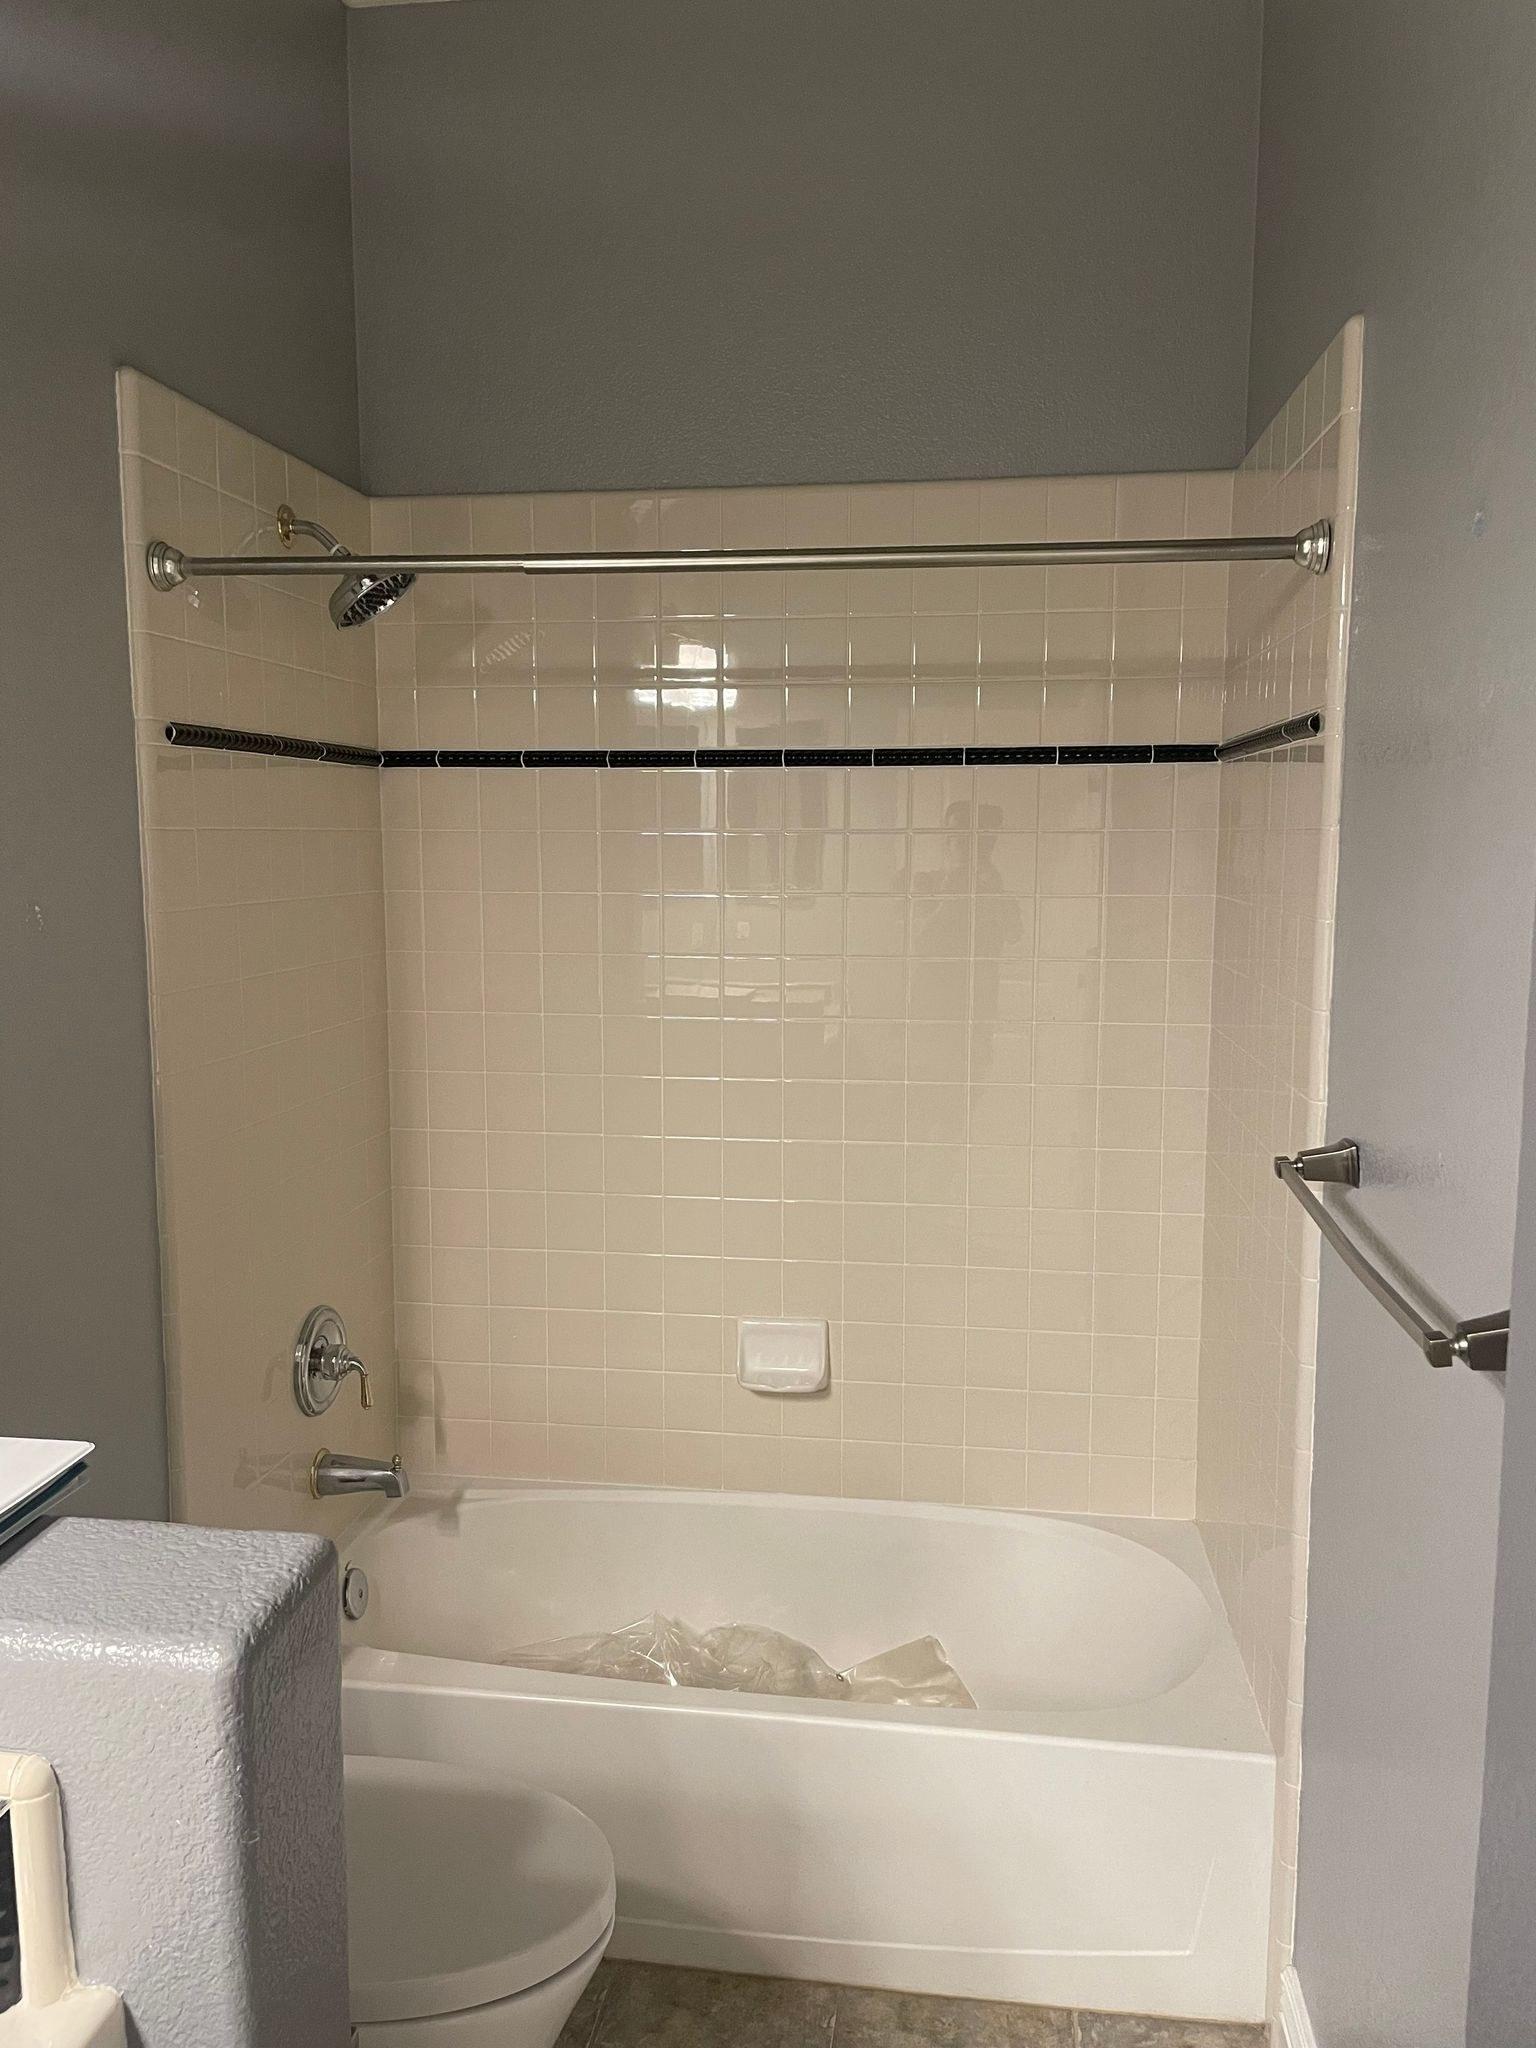 Before
The original tub-shower with square tile and a shower curtain
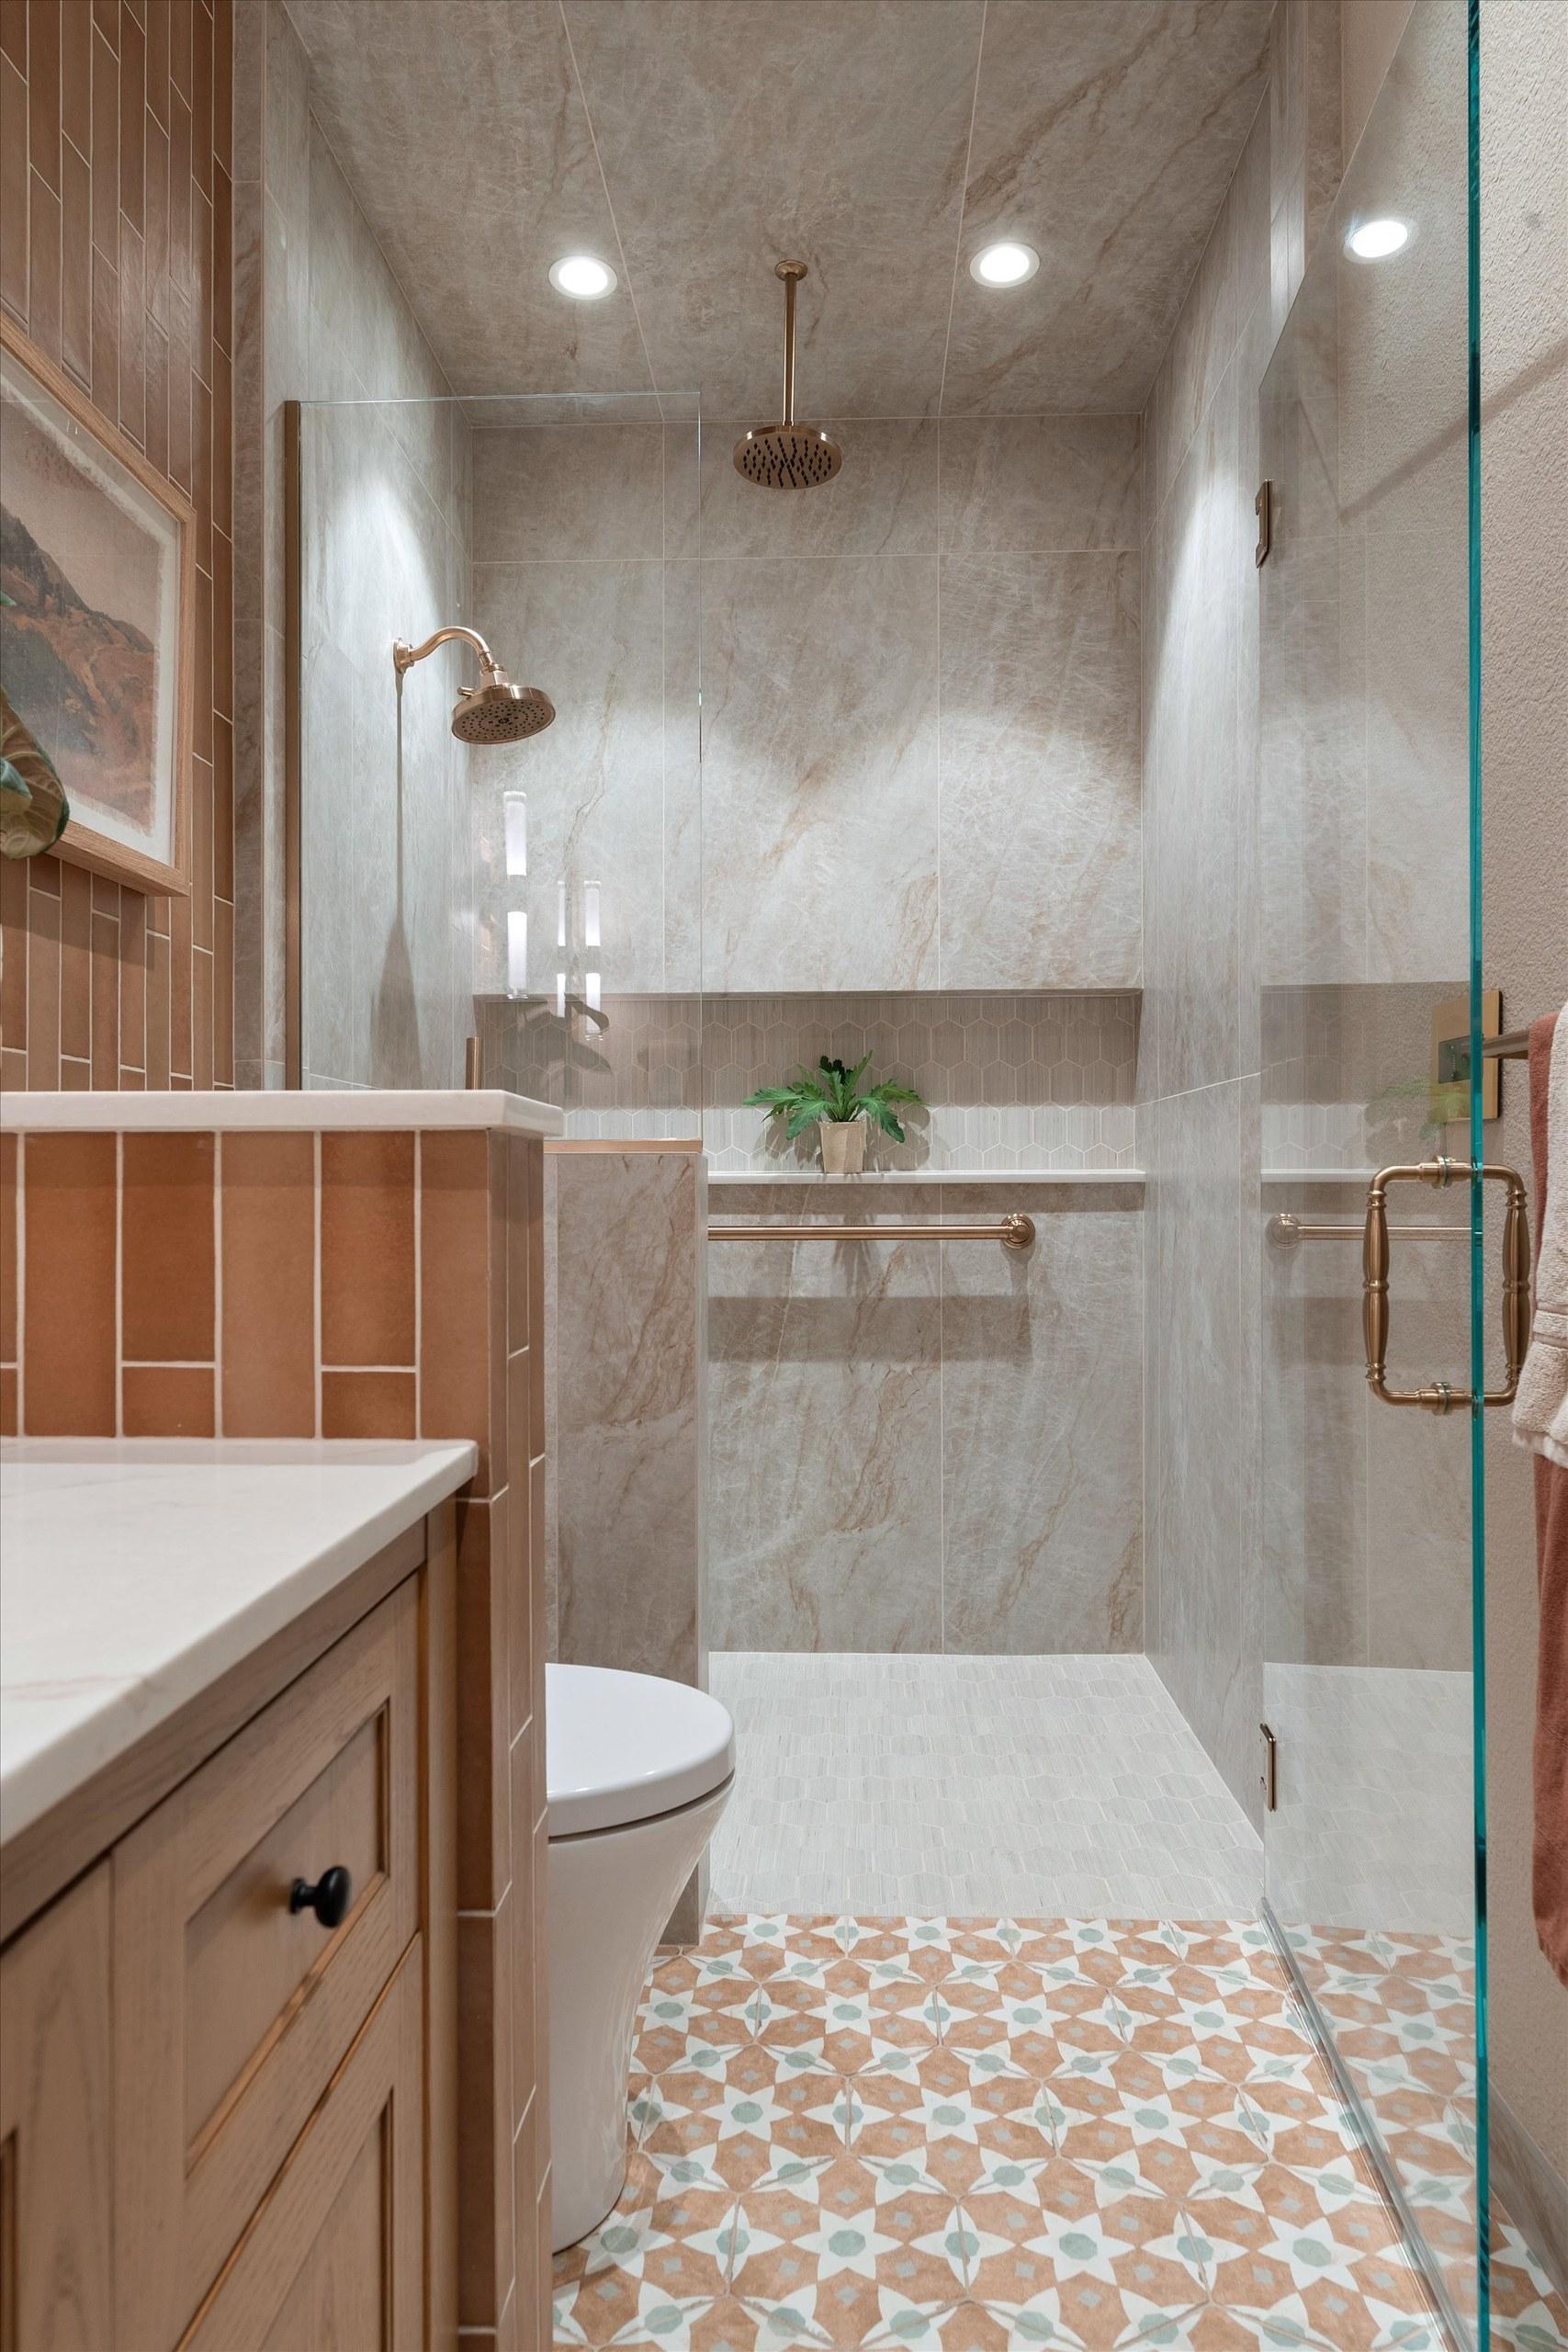 After
Large-format porcelain, a lit full-width niche and controls a caregiver can reach
The Look of a Miter, Built to Last
The design called for fully mitered tile edges on the pony walls and shower opening. Mitered porcelain looks beautiful, but its thin, sharp edge chips easily, and in a room where a wheelchair, a walker or a caregiver will bump those corners every day, that was a real concern.
Traditional miters looked right but were likely to chip. Standard edge trim was durable but visually heavy. Schluter-FINEC, a minimalist profile made to protect mitered edges, solved both: its slim reveal reads like a clean miter from across the room while the profile takes the hits a bare tile edge couldn’t. The homeowner got the look she designed, and the corners will hold up to years of daily use.
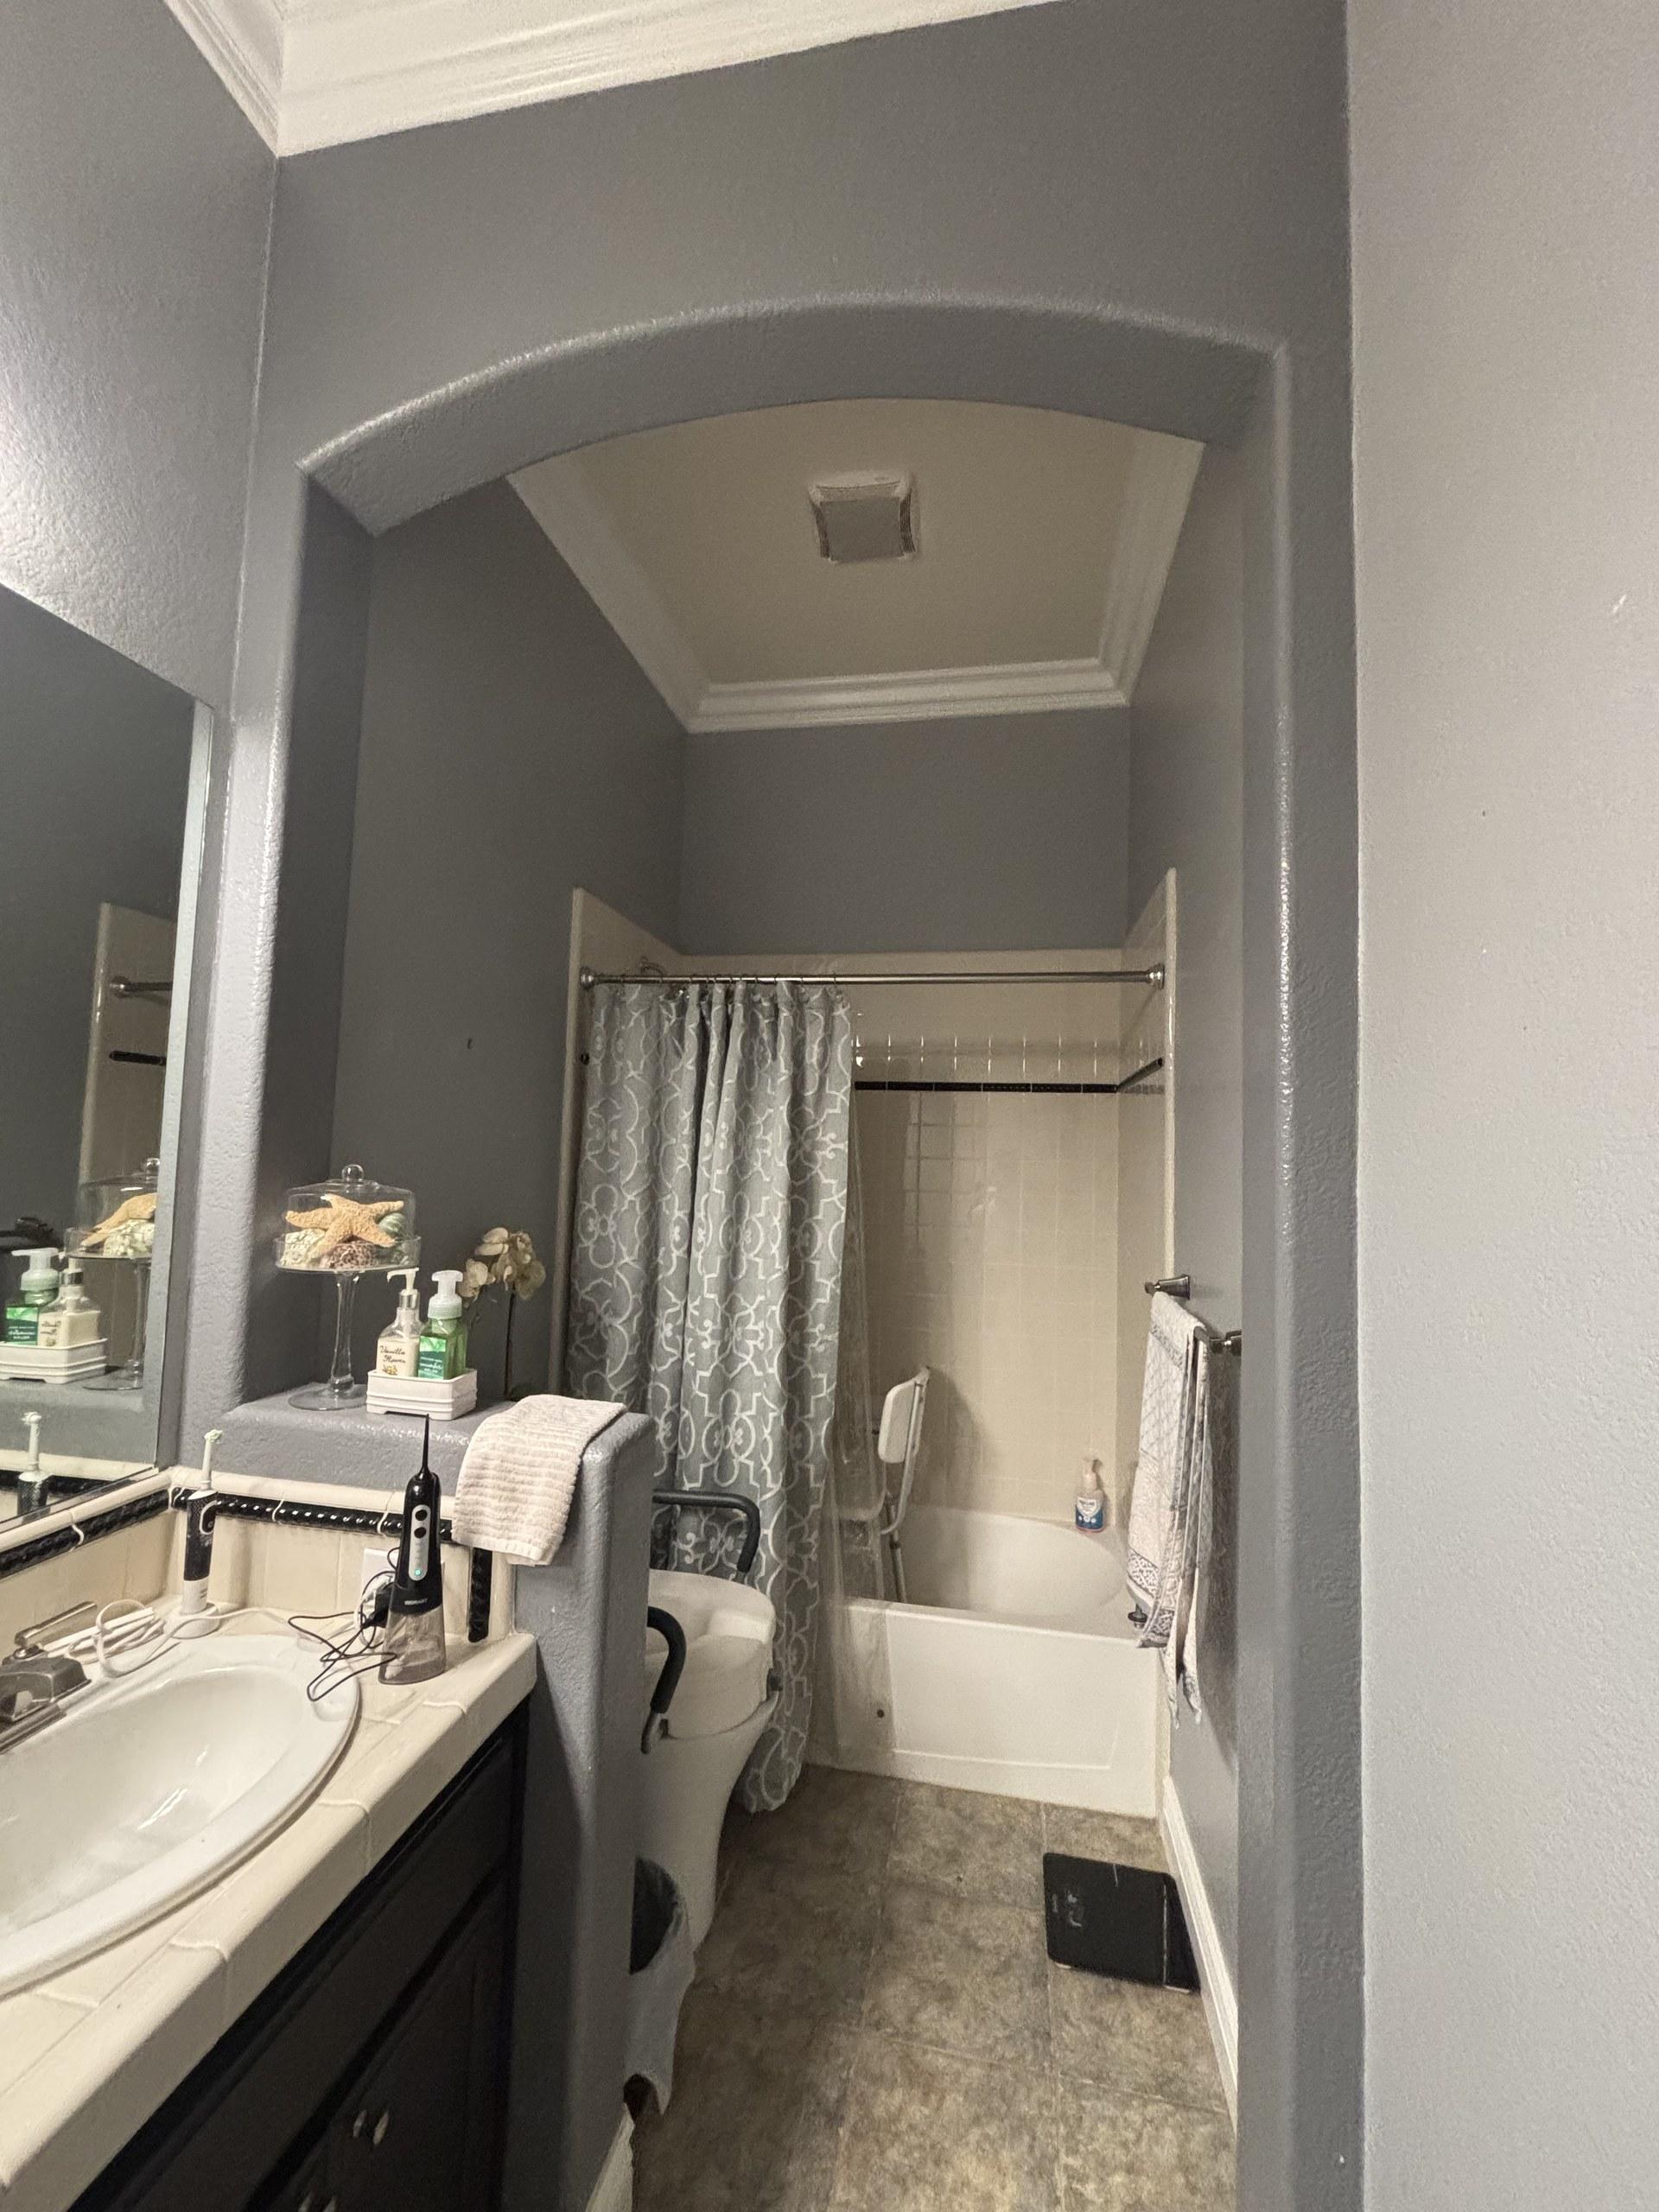 Before
Drywall partition corners and the tub alcove before the remodel
 After
Porcelain-clad pony wall with slim edge-protected corners
The Vanity, Tile and Finishes
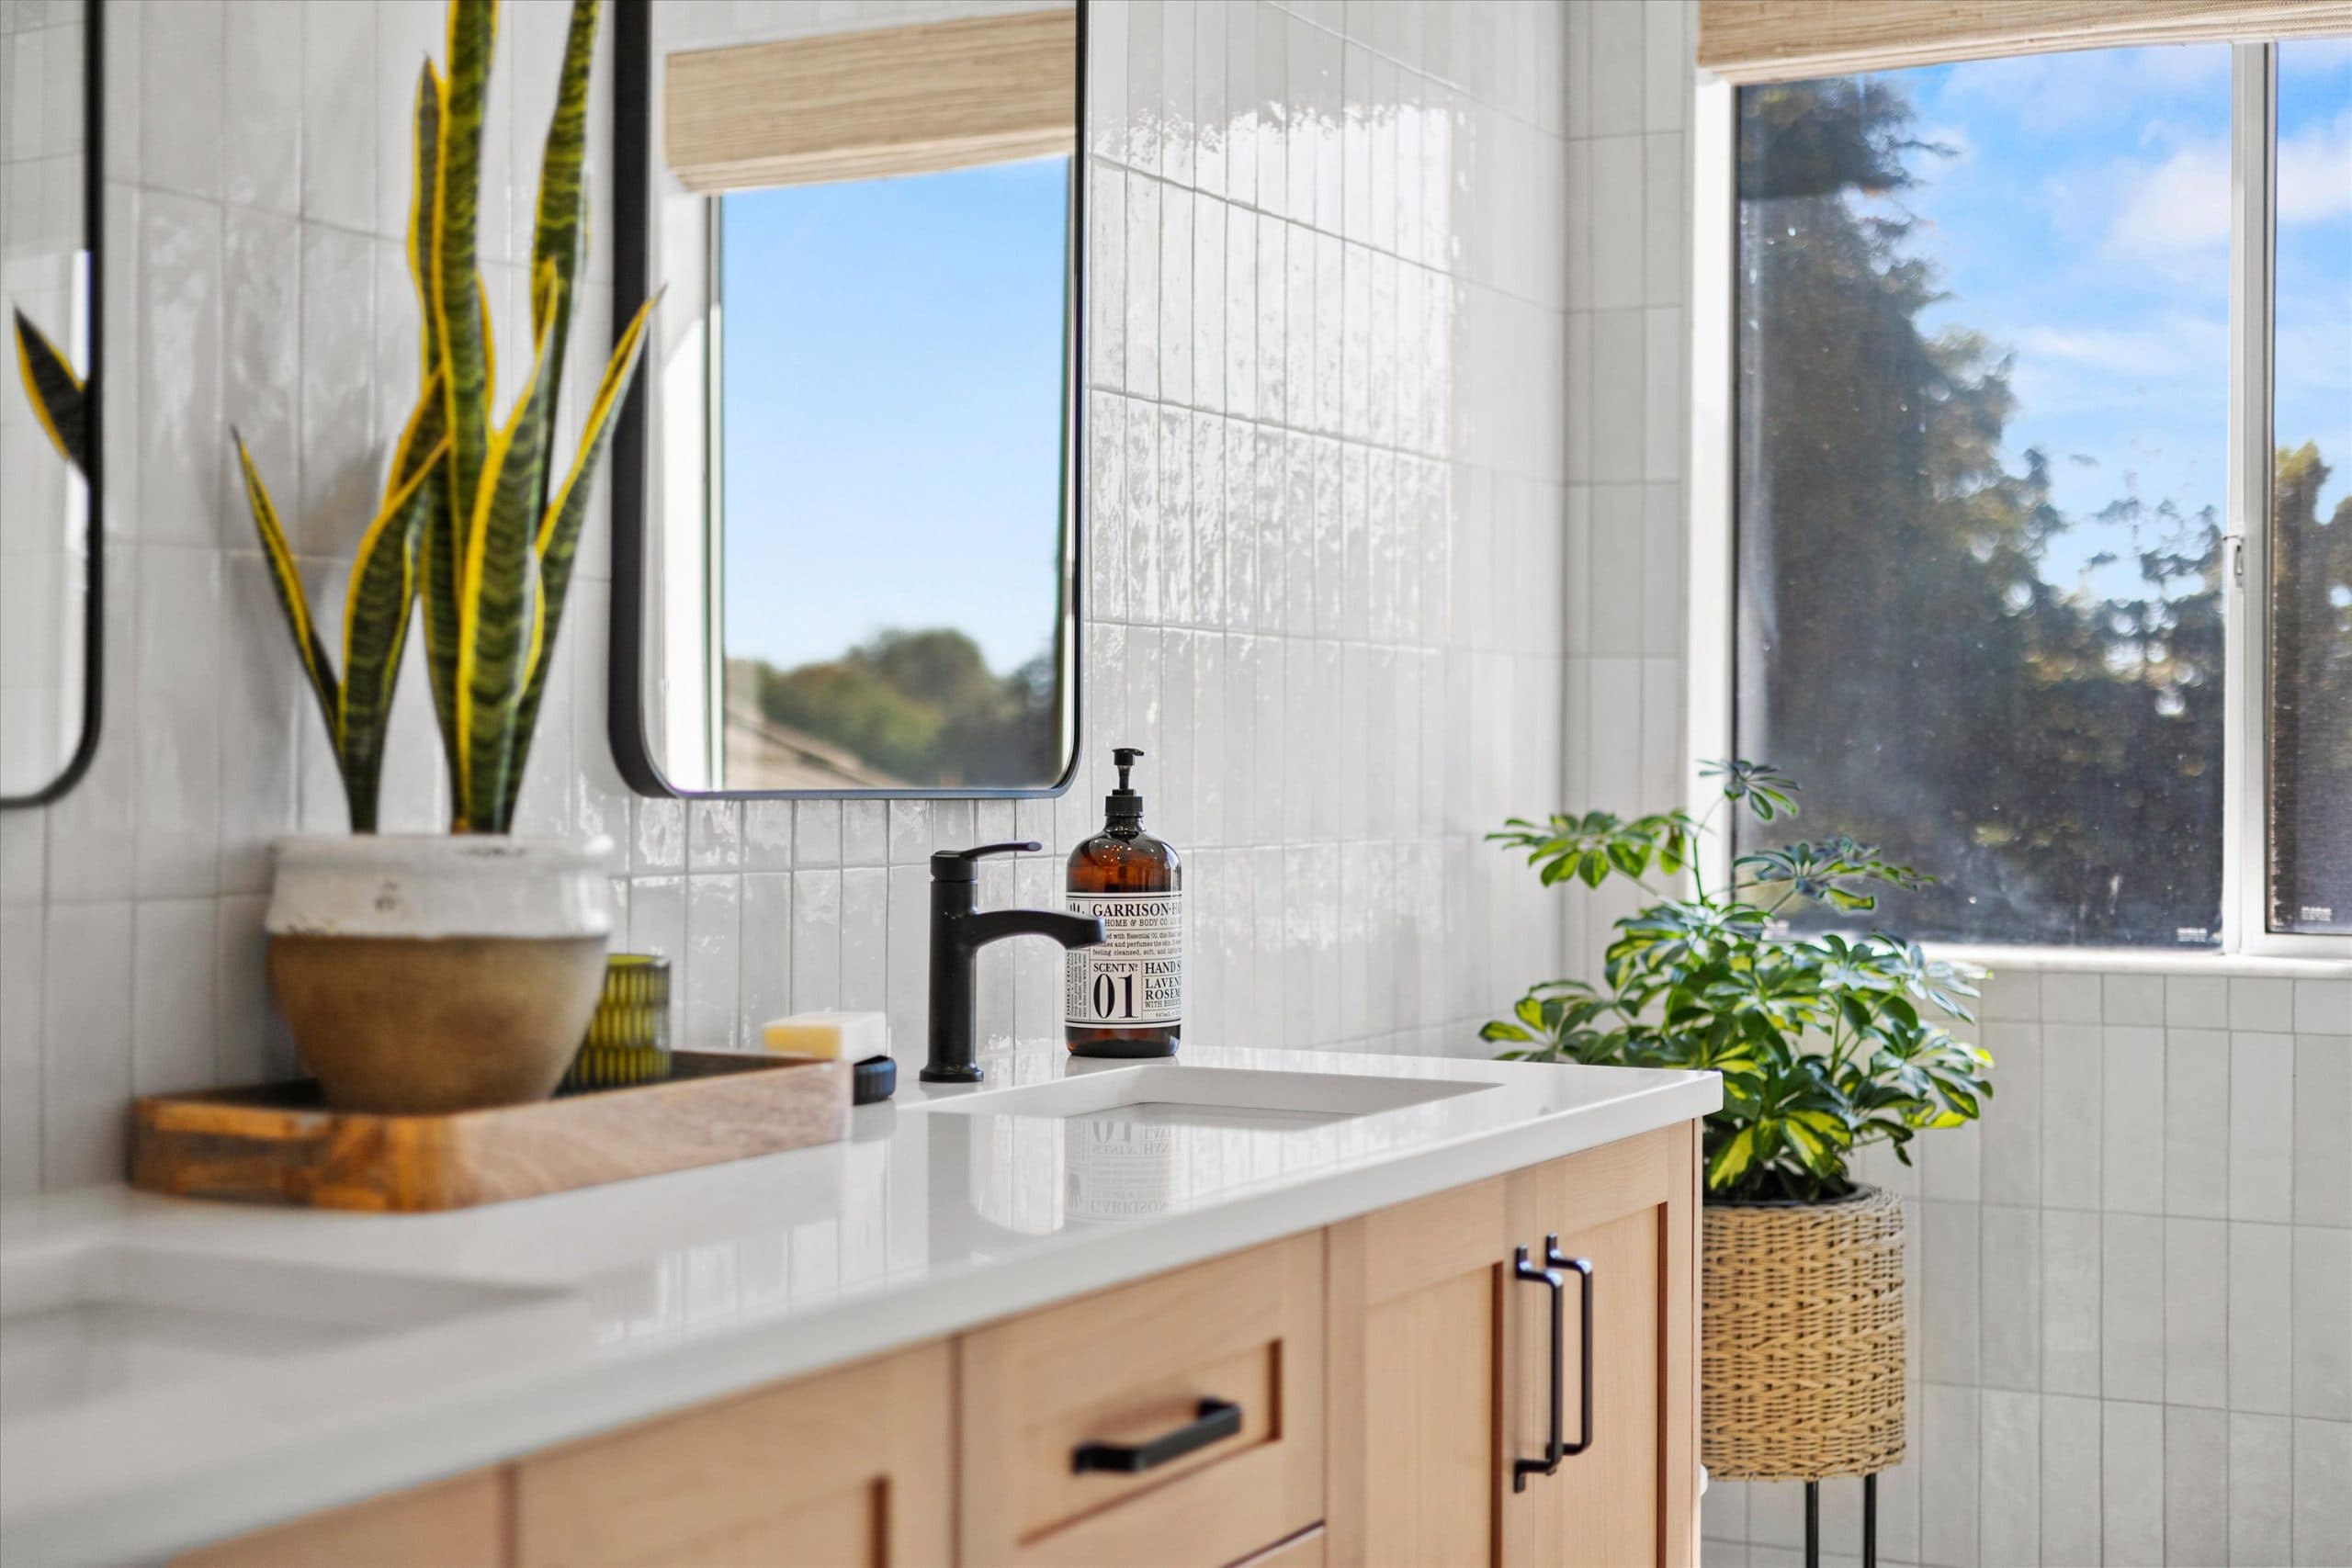
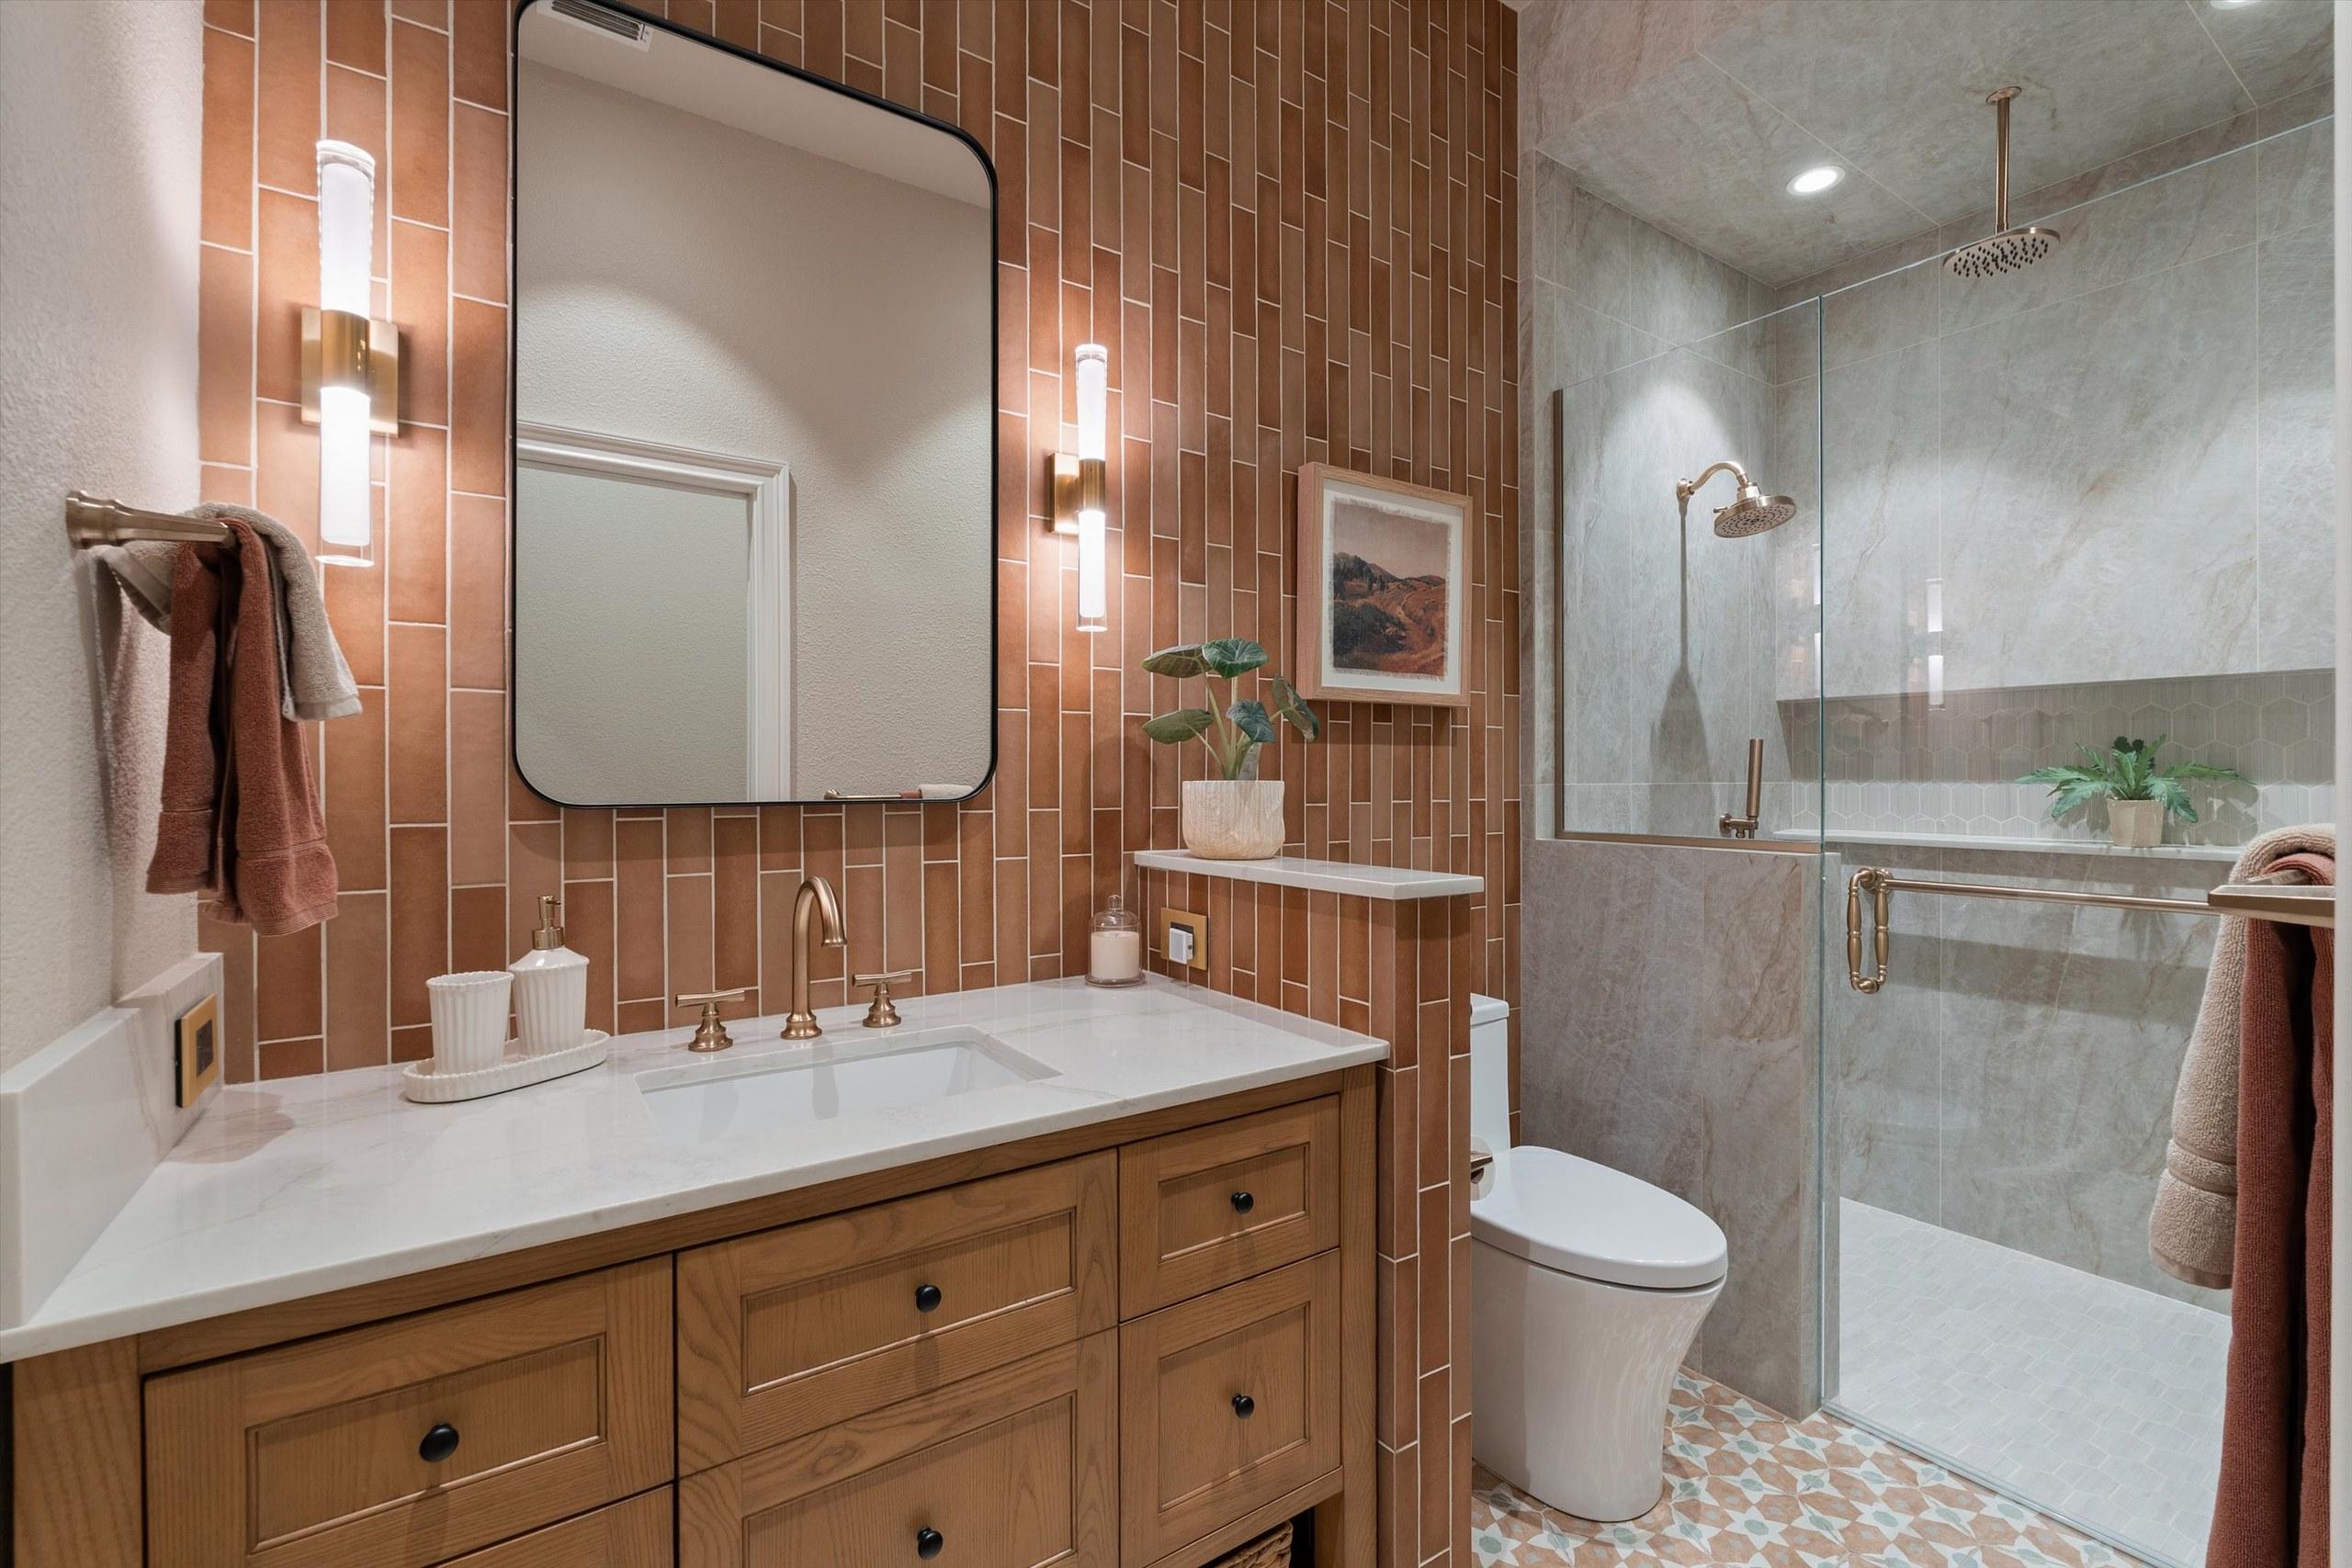
A 48″ James Martin single-sink vanity replaced the double vanity, giving back floor space without giving up storage, and an in-drawer outlet keeps the counter clear of cords. Natural stone remnant caps on the pony walls match the countertop, one of several choices that kept a high-end finish inside the budget.
Terracotta tile in a vertical stack runs floor to ceiling behind the vanity, drawing the eye up to the 10′ ceiling, and the patterned hex floor was dry-laid in full before setting so misprinted tiles never reached the floor. Recessed LED cans light the room, flanking sconces give shadow-free light at the mirror, and the walls were skim-coated and finished in Dunn-Edwards Exquisite matte.
 Before
The original dark double vanity and swing door
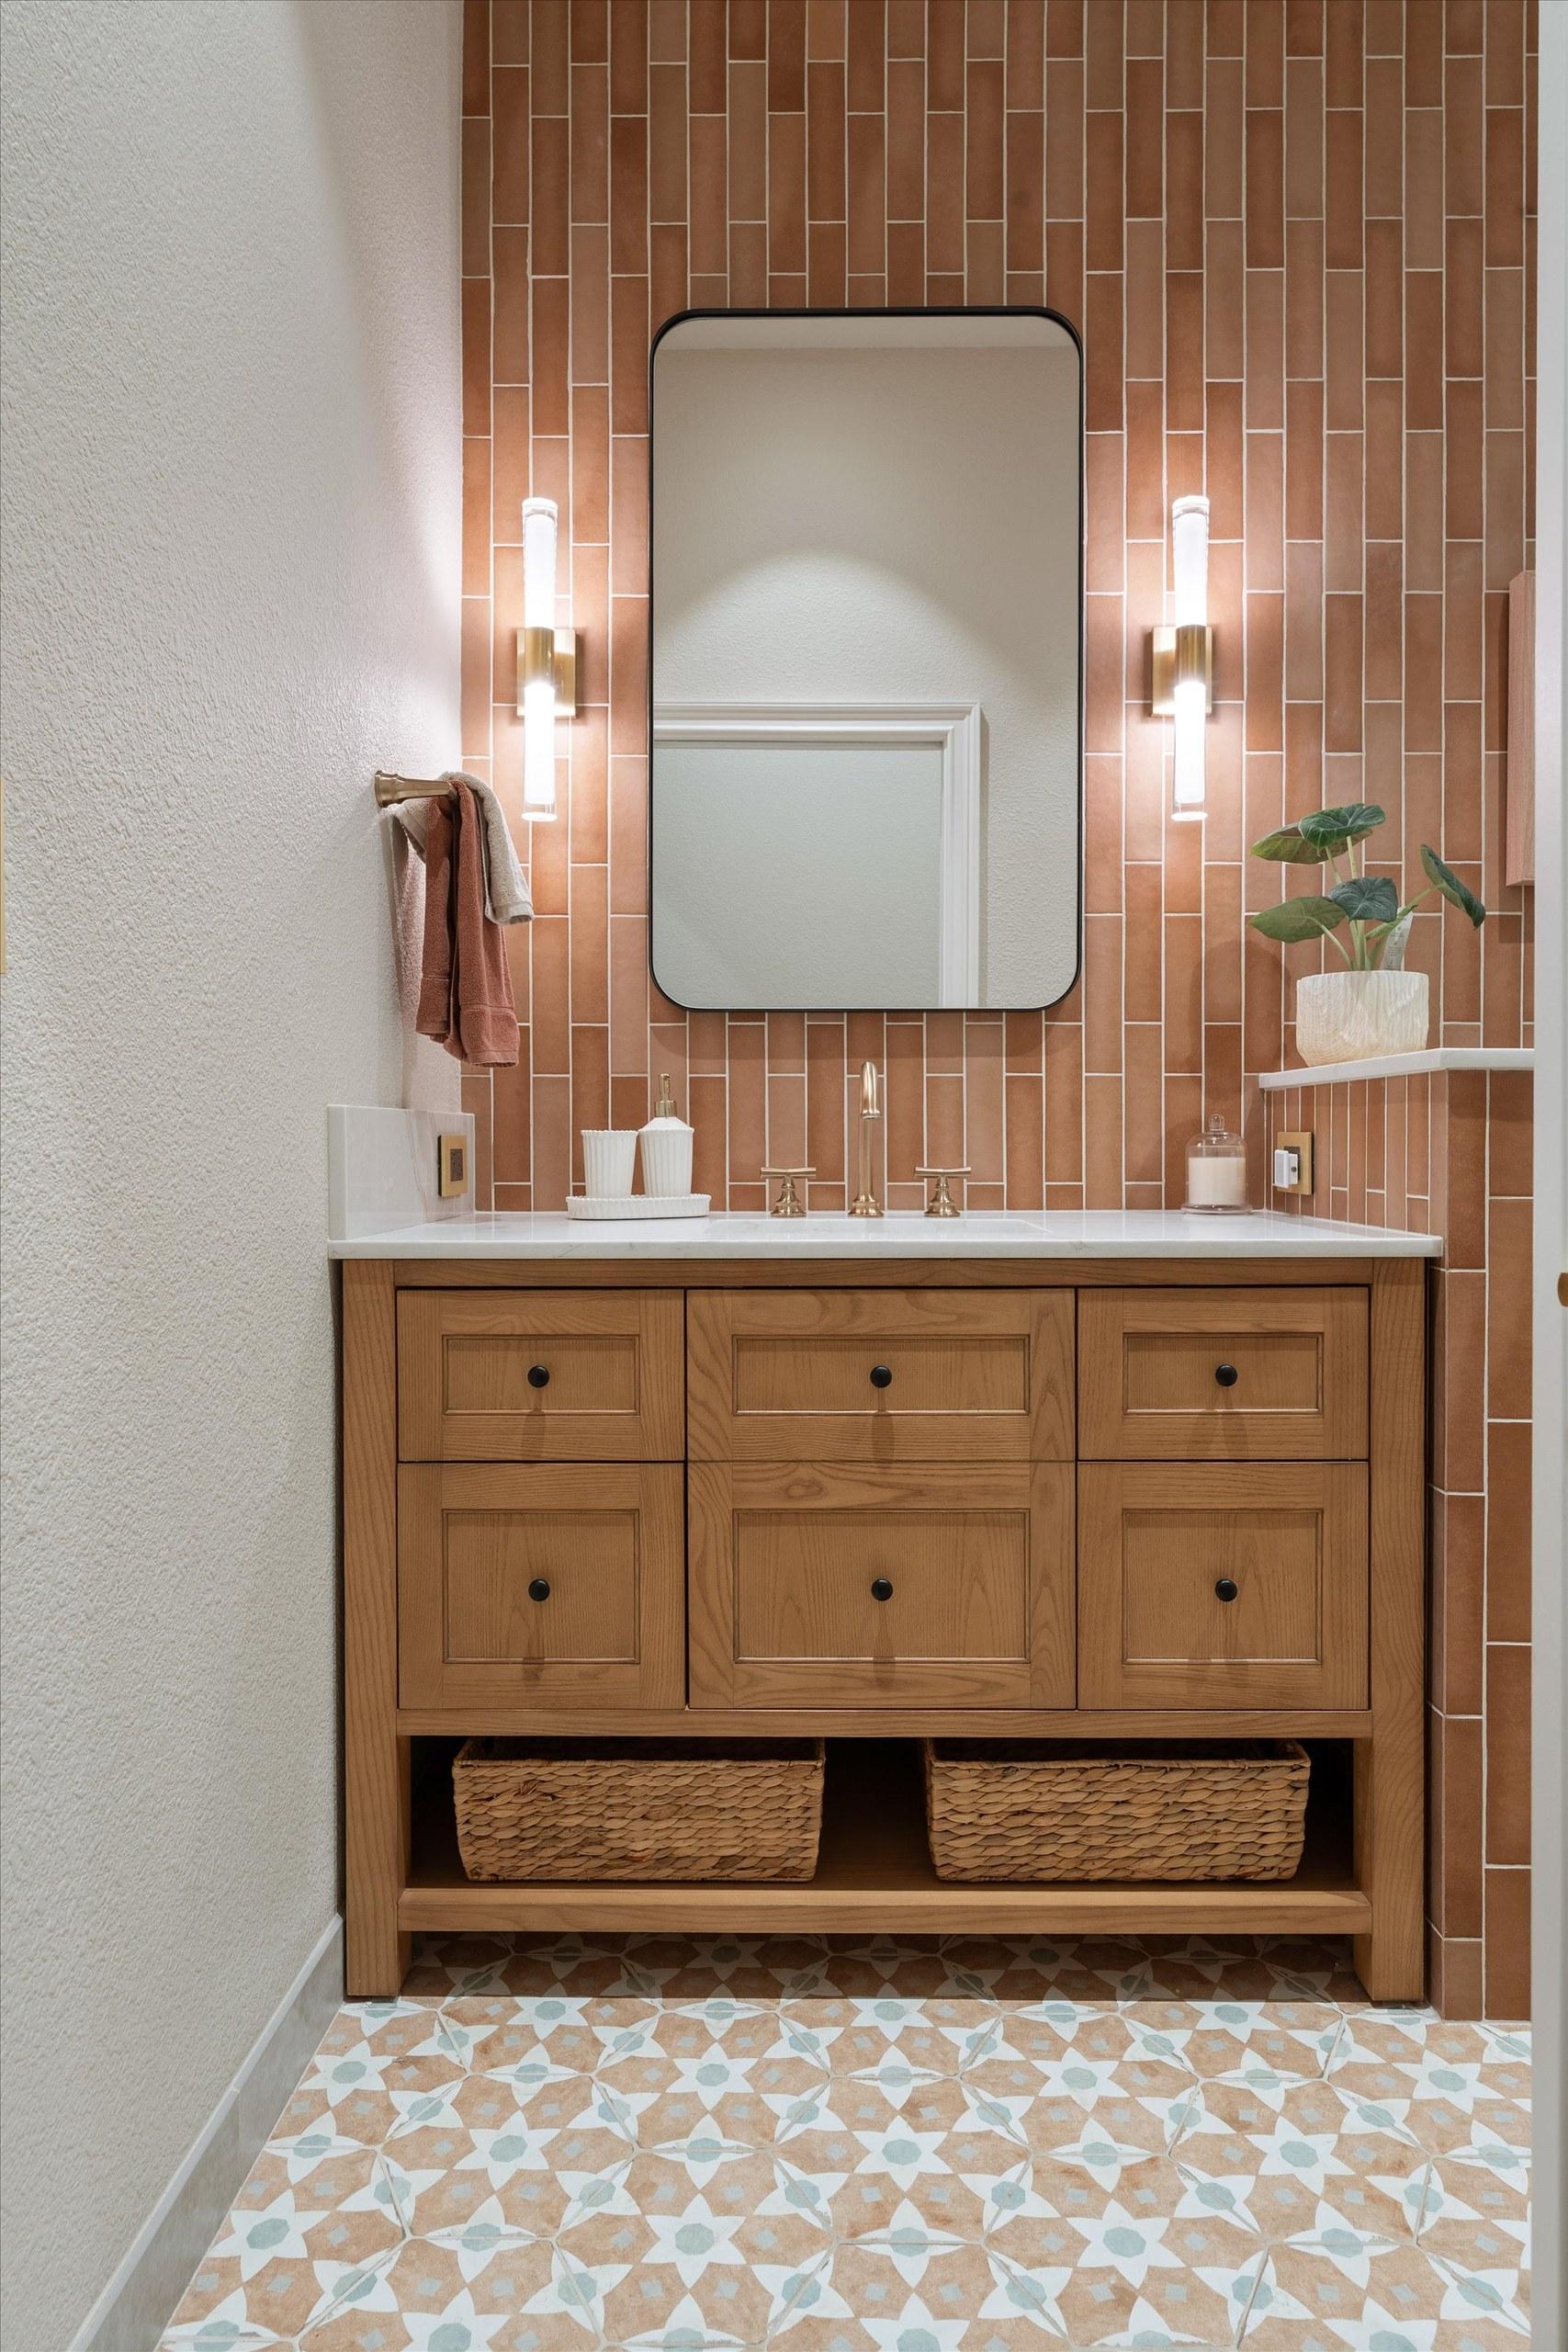 After
A 48″ oak vanity against floor-to-ceiling terracotta tile
The Result
Demolition started in early May, and contractor work wrapped in under seven weeks, with final inspection passed in July. The total came to $38,992, including the homeowner-supplied fixtures and tile at fair market value. When the homeowner’s own tile subcontractor fell through partway in, the team rebid the tile and waterproofing and self-performed both, which kept the schedule intact.
What the homeowner gained is harder to put in a spec sheet. Her mother can roll straight into the shower, a caregiver can work alongside her without fighting the room, and nothing about the space says “medical.”
“Creating a beautiful, safe, and fully accessible bathroom was a top priority. From start to finish, they were wonderful to work with… Most importantly, the bathroom is not only beautiful but also thoughtfully designed to meet my mother’s needs.”
— Homeowner, Roseville
Accessibility here was built into the slab, the walls, the door and the edges instead of bolted on afterward. It’s a bathroom made for daily care that feels like the best room in the house.
The Finished Space